Be sure to follow us on Pinterest and Instagram to never a thing!!
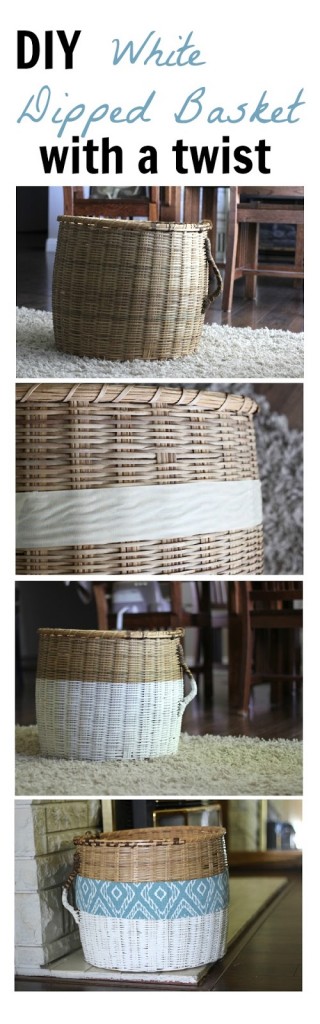
It seems that a lot people love dipped baskets, am I right? They have great contrast and you can choose almost any color, white seems to be very popular. I think they are super fun.
Did you know that they are easy to make…?
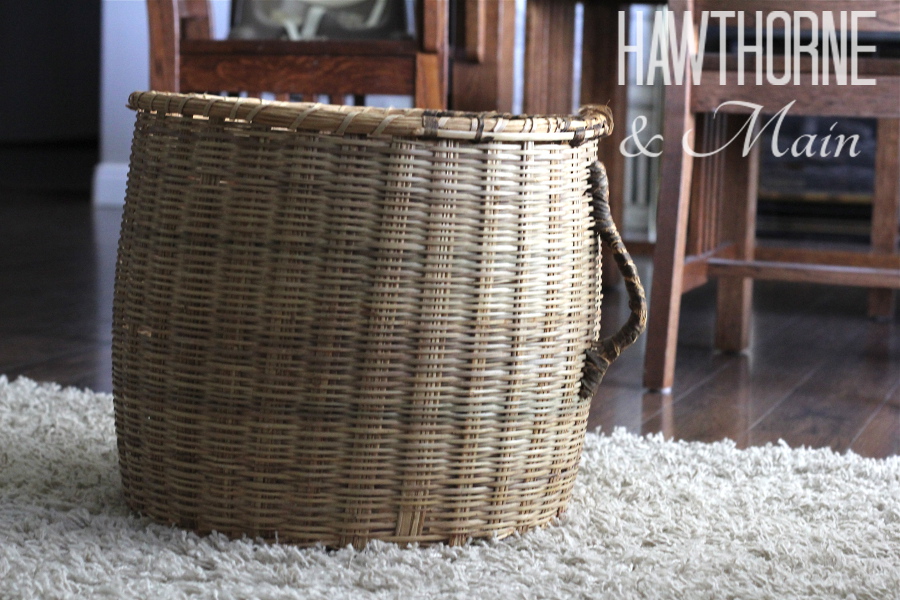
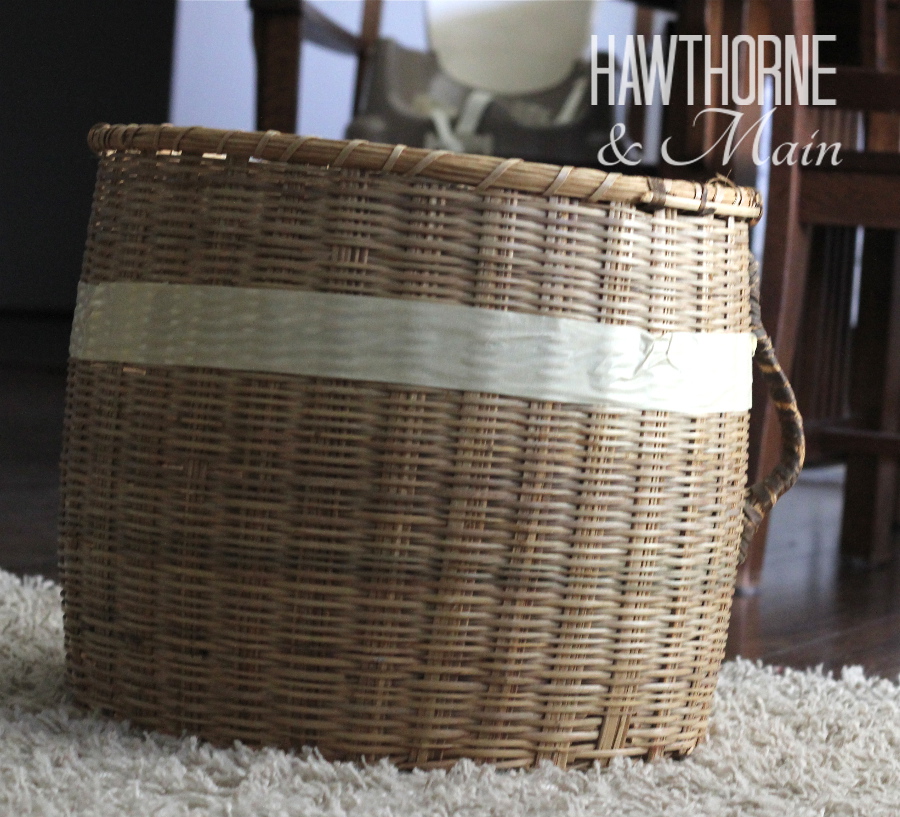
The before basket, and honestly I liked it this way. I really like that it has lighter and darker tones.
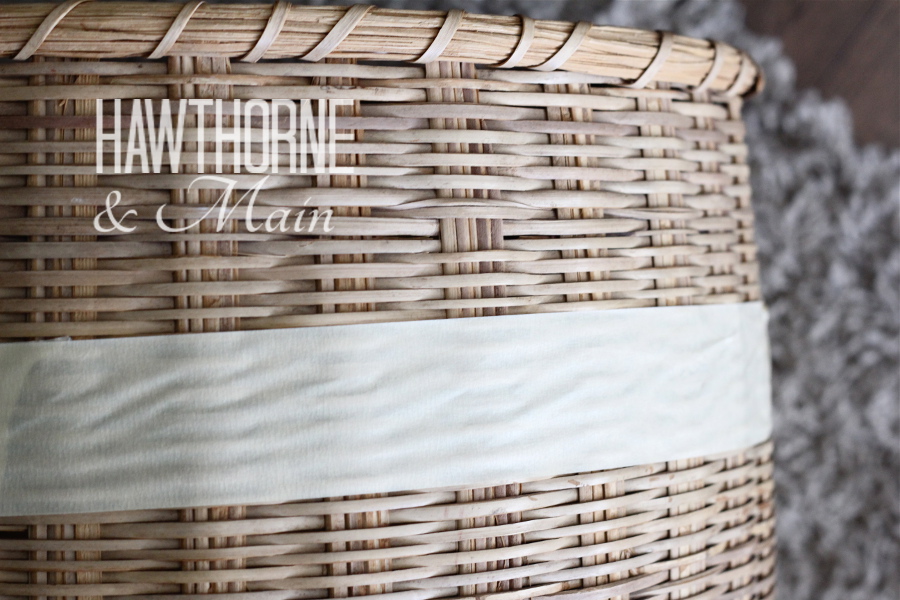
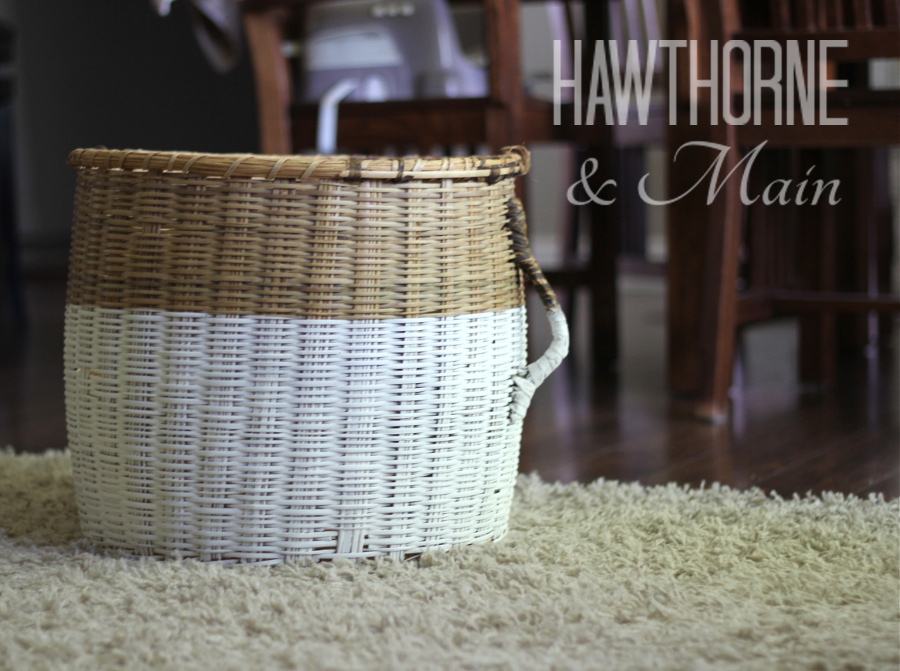
Take some masking tape and put a line on the basket to maker the end point of the white paint. This will give you a nice clean line. The line on this basket is about 2/3 of the way up.
I used my Annie Sloan chalk paint for this project.
To apply the paint, dip just the tip of the paint brush in the paint as to just get a little paint on it.
Brushed back and forth and up and down, to get the paint evenly coated on the basket.
After the paint is done drying add some Annie Sloan clear wax to give it a nice finish. To add the wax, you can either brush it on or use a rag to apply it. Get a little bit of wax on the cloth and begin to rub it onto the basket. Take a different clean cotton cloth to remove any excess wax that the paint did not pick up. The wax will give a nice satin look to it.

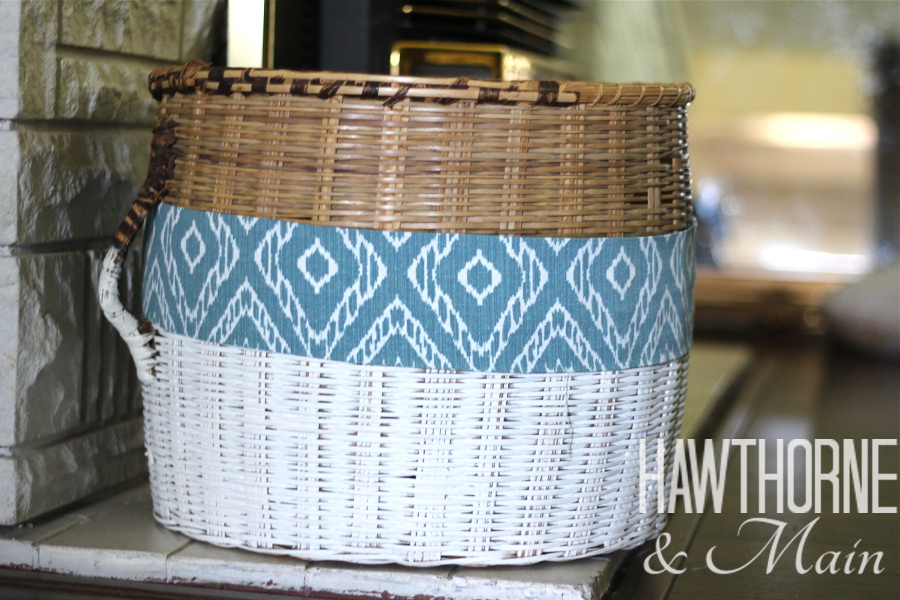
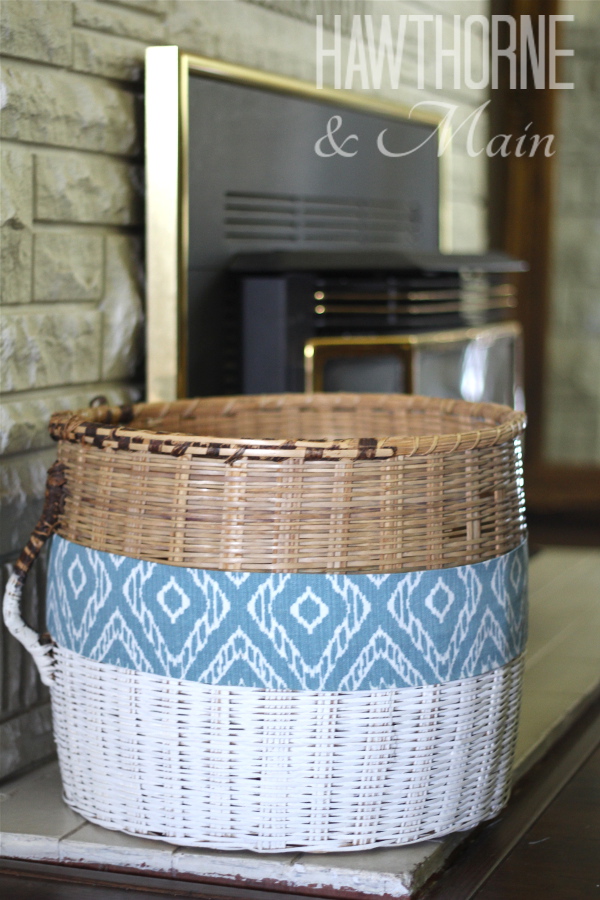
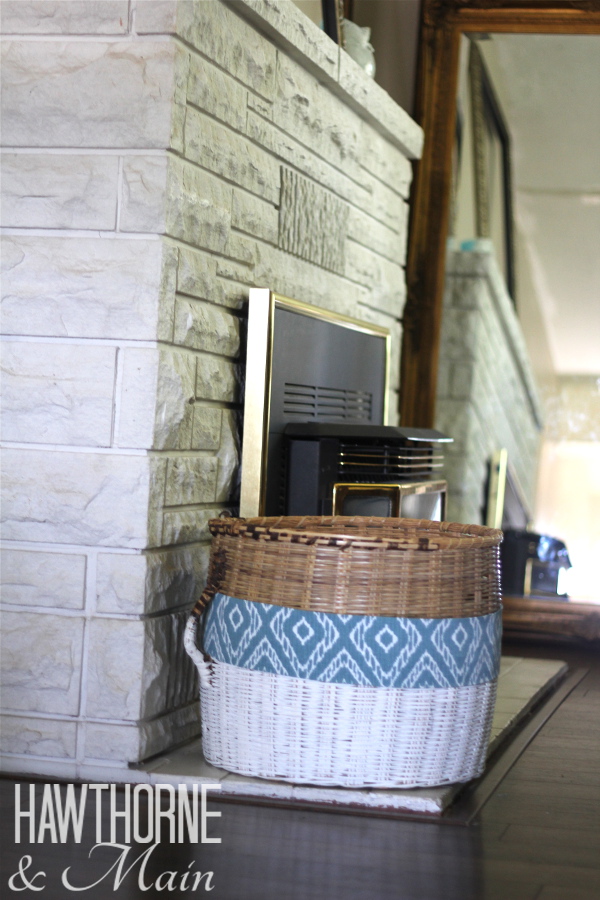
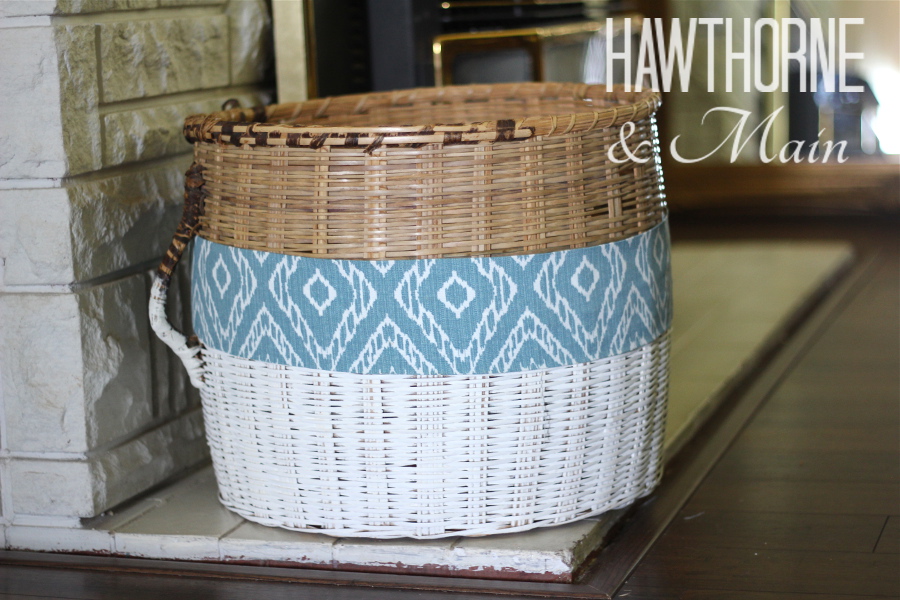
Here is the after of my basket. It looks great and technically you could stop here. But I went a step further.
Grab a small piece of fabric that is long enough to go around your basket. Look for one that has a little bit of stretch to it.
The sides of this basket are fairly straight but if the basket was curved any material that is not stretchy will have a hard time conforming to the basket.
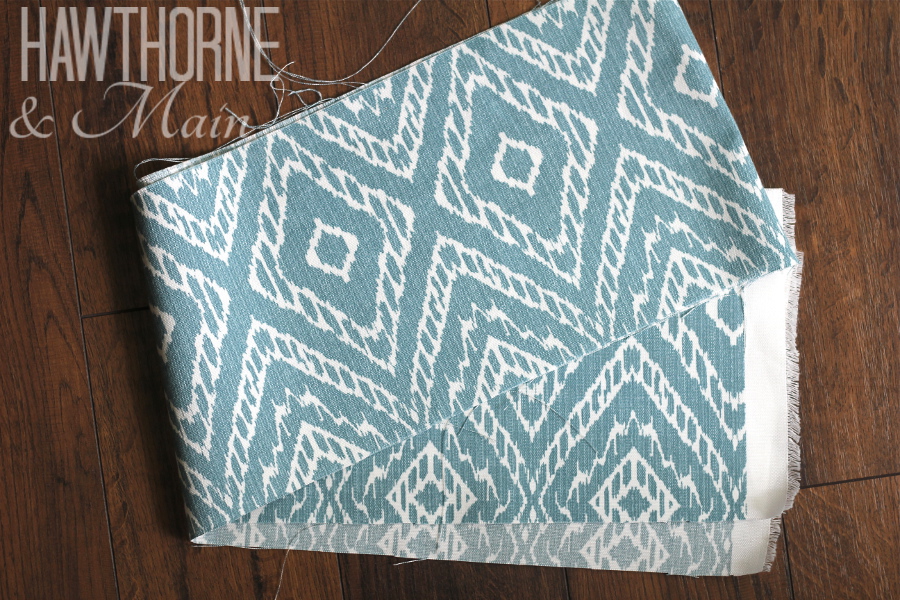
Using your iron, iron down all of the edges to make a clean line. – see image below
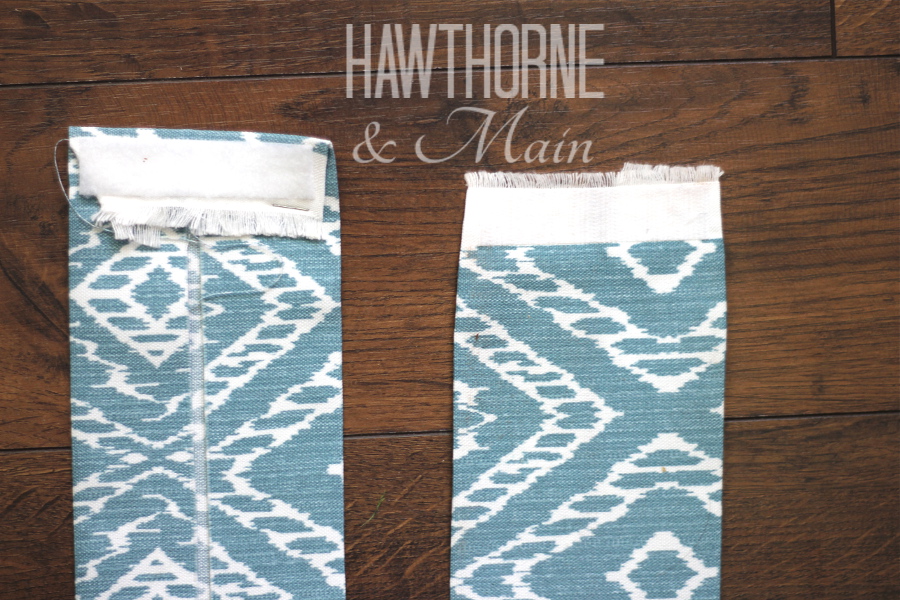
Next, grab some Fusible Velcro. The fusible Velcro is so easy to use and since its fusible there is no sewing involved, YAY!
To use the Velcro, cut it to size. Place each Velcro piece in its desired spot and place a hot iron on top for a few seconds until the Velcro bonds to the material (read the back of the package for exact heating times and temperature).
Make sure you measure and mark exactly where you want the Velcro to go before you iron it. This stuff sticks very well to the fabric. If you have to take the Velcro off because you measured wrong, it wont stick again.
When adding the Velcro to your fabric, one piece of the Velcro goes on the front or right side of the fabric. The other piece of Velcro goes on the back or wrong side of the fabric. See my picture below. For this project it doesn’t really matter which piece you put on the front or back.
After the Velcro is on you are finished!!
Attach it to your basket, step back and admire it!!
How fun would it be to make a few of these to add throughout the year as the seasons change, or even for holidays!!
What do you think, yay or nay on the faux dipped basket?Have you ever made one?

the Hawthorne and Main blog uses affiliate links, to learn more check out our policies page


Love it!! I want to recreate one similar to yours if I can score a basket at DI. Where did you get the AS chalk paint? I've tried making my own but haven't been impressed…
Yumi I got my chalk paint at a local store. Here is the link http://www.anniesloan.com/acatalog/North_American_Stockists.html to all of the stores in Utah. This paint is so easy to use, I literally got it painted in less than 10 minutes. I also really like the brush. Good luck finding a basket DI can be hit or miss.
Oh my gosh, I LOVE it! I have been dying to try Annie Sloan, but I am too cheap to give it a try, haha! I have heard it’s amazing. Seriously, love the basket. The fabric is so cute.
Thanks Beth! The paint is an investment but I really like it.
My living room truly needs a basket just like this for all our favorite blankets. I love that you used velcro for the fabric wrap! Smart girl!
Pinning!
~ Ashley
Thanks Ashley! I also have thrown a couple blankets into this basket. I love that fusible Velcro, I just might have to use it on some more projects!
This is such a great way to spruce up a basket! I love the added fabric. Thanks for linking up with us at The Makers! Happy to have discovered your blog. Pinning 🙂
Corey @ TinySidekick.com
Corey thanks for stopping by and taking the time to comment! I love dipped baskets but wanted a little color. Fabric just seemed like the best option. I am glad that I found your link party, so fun. Oh, thanks for the heads up on my Insta button. I think I fixed it! Thanks!
Just a little FYI: The Instagram button on your social media buttons doesn't work. It goes to image maps 🙂
The basket turned out great! Looks nice!!
Thanks for sharing!
Thanks Bobbie!
Cute! Love the fabric strip too! Stopping by from Merry Mondays.
Blessings,
Shari
Shari thanks for stopping by!
Very pretty!
I am a basket hoarder…
I love the "dipped" look but that fabric just adds the perfect touch!
J Shrewsbury I have to admit that I really like baskets too. Thanks for stopping my!
Love baskets and I REALLY love them dipped! I just wanted to let you know that I will be featuring this post on Tuesday with a Twist link party this week, stop by for a peek. Have a blessed day. 🙂
Awesome, thanks!
What a fun project. Your basket turned out wonderful and I love the added fabric. Thanks so much for sharing your great tutorial with us on Merry Monday.
Thanks for stopping by!
Super cute! Pinned. Thanks so much for being a part of our party! Please join us tonight at 7 pm. We love having YOU! http://loulougirls.blogspot.com/
Happy Monday! Lou Lou Girls
Thanks Kimberly! I love the Lou Lou Girls link party! Thanks.
Will be featuring this awesome basket tonight on Trash 2 Treasure Tuesday Link Party. Thanks for linking up!
Thanks Kammy, I love your link party!
This is super cute! What a great addition the fabric made! I would love it if you linked this up to my Motivate Me Monday linky party at IT'S A ginger SNAP.
Kdbug I will definitely link up! Thanks for stopping by.
I am obsessed with baskets as storage and I love your dipped basket! What a fabulous idea to use fabric for a splash of color. And so nice that you can change it out so easily…how cute would it be with Christmas colors when the season comes along?! Thanks so much for sharing at Much Ado About Monday! Pinning!
Lydia thanks for stopping by! That is such a great idea to change out the fabric to coordinate with each season. Love linking up to Much Ado About Monday Linky. Oh and thanks for pinning!
Definitely love this! The fabric is a lovely touch.
Thanks so much for linking up to Project Inspire{d}!
Stephanie thanks for stopping by!
Hi Shonee, Just wanted to lyk that you will be one of the features on tonight's Merry Monday Linky Party. Hope to see more from you tonight at 6pm PST.
Erlene thanks for featuring me! Love linking up at Merry Monday Linky Party. Have a great day!
Sooooo cute! I honestly loved the look of the basic before, but the after is kind of amazing.
I too liked the basic before. I kept it untouched for about 1 month until I decided to paint it. Thanks for stopping by!
Hi, um can I just say that I LOVE your basket! This is so cute and I want it in my home. 🙂 Thanks so much for linking at On Display Thursday!! – Bre @ Average But Inspired
Bre thank you so much! Hopefully you can find a basket to use and make your own. It really is a super easy project. Love linking up at On Display Thursday! Thanks
Love this, Shonee! Especially the fabric addition!! ~Amy
Thanks Amy!
I love a great upcycle project. This is perfect! Thank you for liking it up to The Creative Collection Link Party! Have a great week.
Rebecca I totally love upcycled projects too! It is so fun to take an object and give it new life again! Thanks for stopping by.