This post is in collaboration with Z Counterform. All options of amazing DIY counters are my own. See my disclosure for more info.
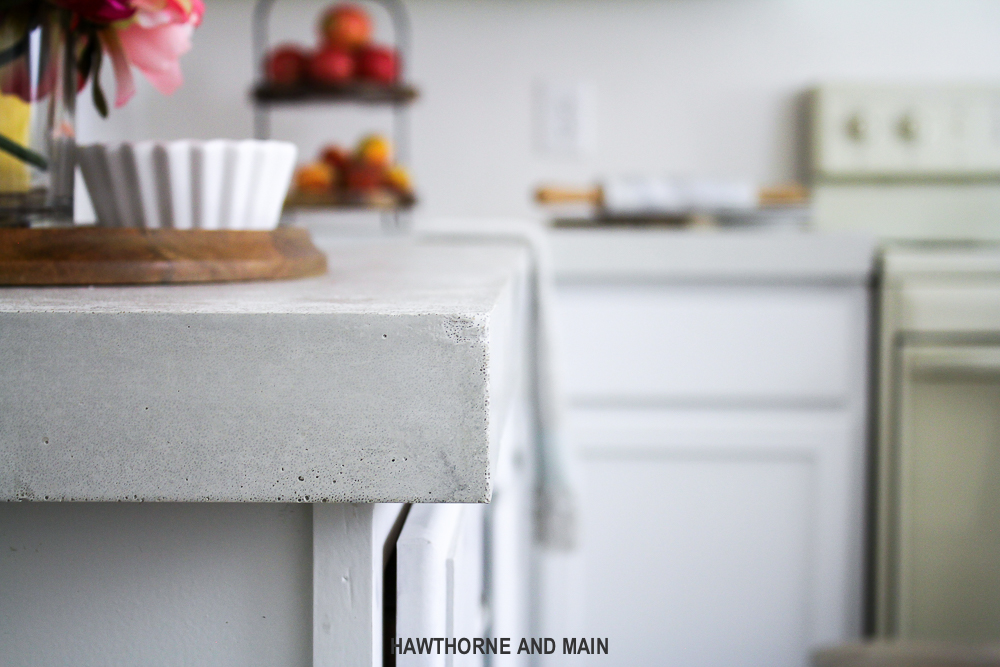
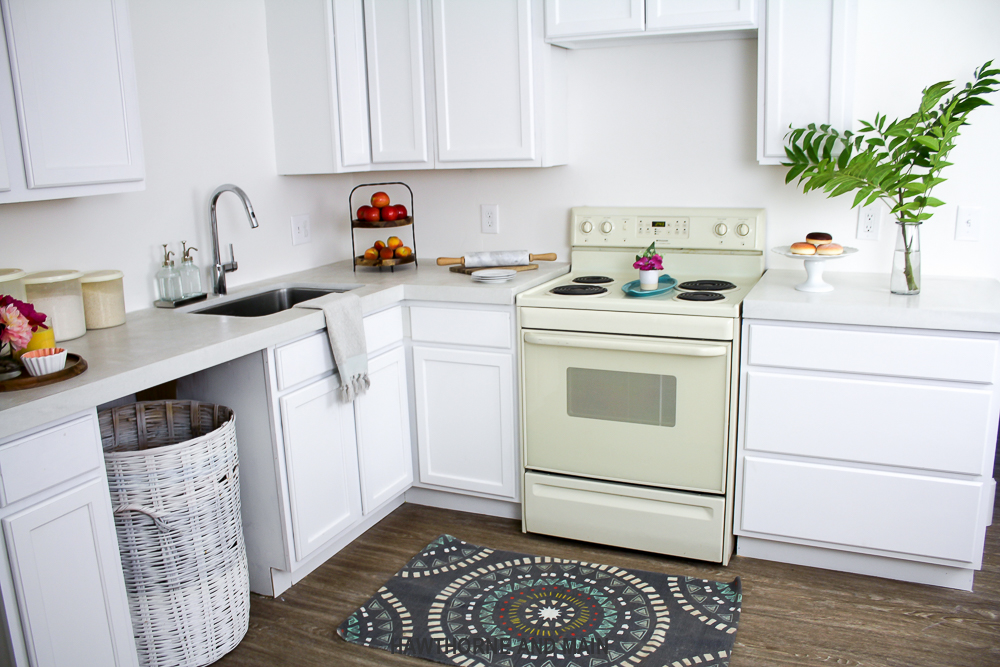
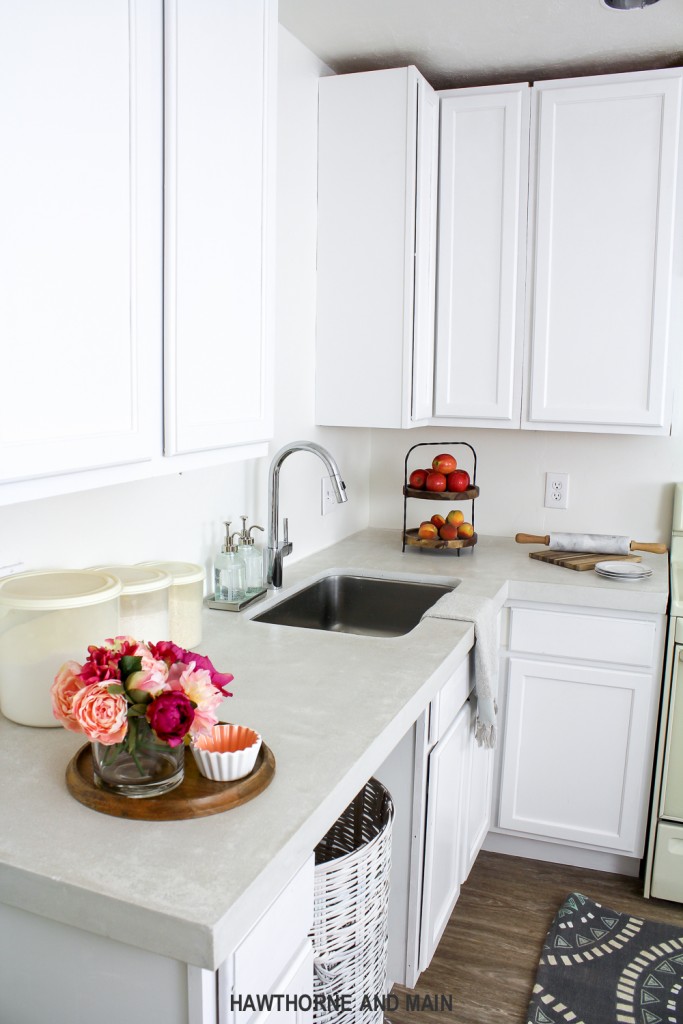
The countertops in The Suite Pecan are done! It was a long road to get them finished, mainly due to some building set backs, being pregnant, and then having a newborn….haha. The kitchen isn’t completely finished yet, but I am pleased to show you how amazing the countertops turned out!
When deciding on what type of countertops to do in the kitchen I was drawn to the modern look of the concrete countertops. I searched for concrete brands and ultimately decided to go with Z Counterform because they cater to the DIYer. We opted for the white countertop concrete mix with the square edge counter forms. We DIYed the countertops ourselves….yes….it was all us. And I am super excited to show the process of how we installed them, plus a few things we learned along the way.
PREPARATION:
This is my least favorite part….yuck! But, it is the MOST important part. Think of it like this. You cannot expect the finished product to look good unless the base it right. Prep work will save a lot of issues down the road.
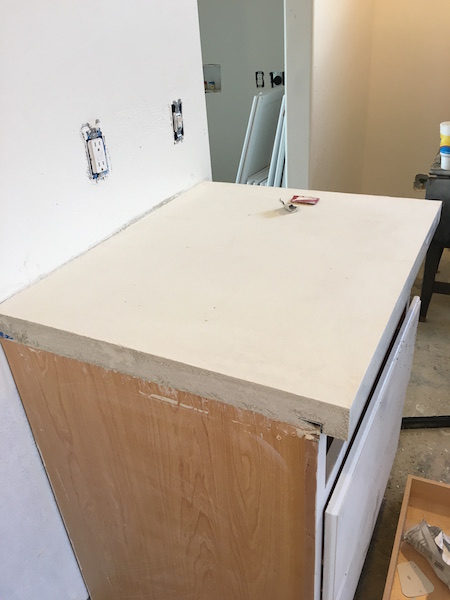
We started off by securing 1/2 inch Durock to the tops of our cabinets using only silicone in between the Durock and the top edges of the cabinets. We did this just in case we ever have to change out the counter tops. (hopefully that never happens) Durock is basically a type of cement board and can be purchased at most home improvement stores.
We kept it simple by first laying an uncut sheet on the top of our largest section of cabinets (see pic below), then reached under the board and traced along the edge of the top of the cabinets onto the Durock. We then removed the sheet of Durock and used a utility knife to cut out our L-shaped piece. The last piece of Durock (needed on the cabinet to the right in the picture below) was easy to cut using a measuring tape, straight edge and knife.

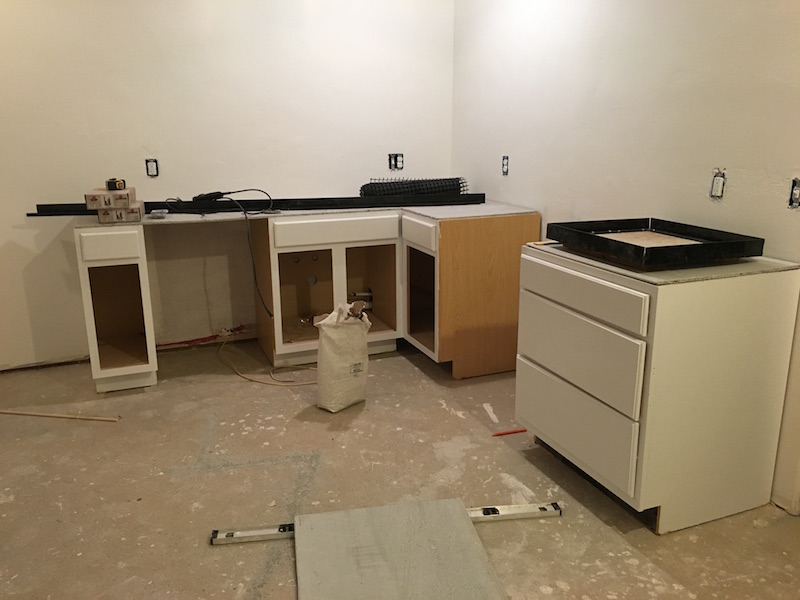
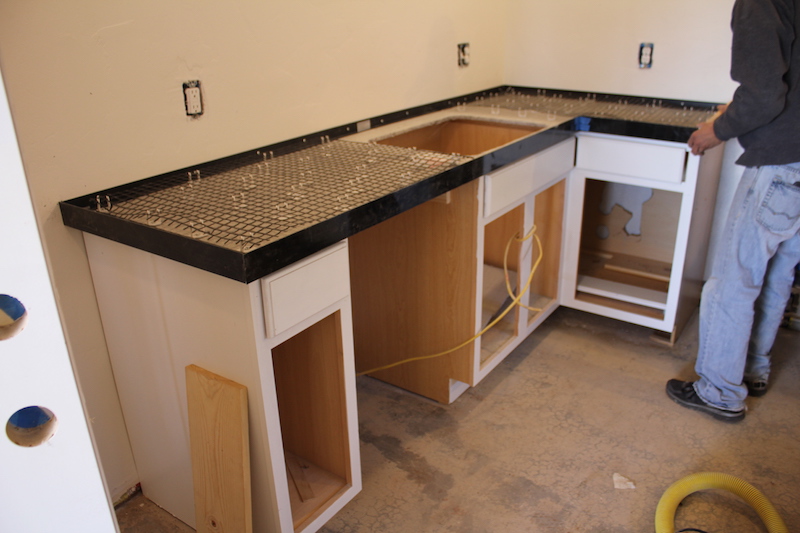
After the durock was in place we started adding the forms. The back edge form (against the wall) is basically a 90 degree straight edge form. These are screwed onto the edge of the Durock using 5/8 inch construction screws.
The form for the front edge has a dip. This makes it look like the counters are a full 2 1/4 inches thick. There are many different countertop profiles to pick from. We decided to go with the simple square edge.
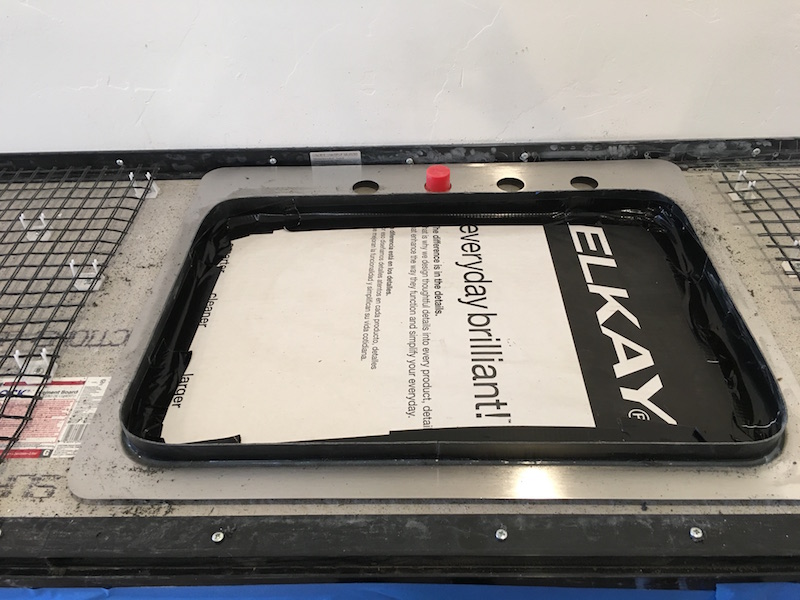
For this kitchen we installed an undermount sink. This required us to use the sink form which basically created a barrier (equal in height to the forms on the front and back edges of the counter) to prevent concrete from spilling into the sink.. We used silicone around the bottom edge of the sink form to prevent wet concrete from running into the sink from beneath the sink form. We used the sink template to cut a piece of cardboard to fit inside of the sink to act as yet another barrier for wet concrete entering the sink.
We used Z Counterform’s faucet knockouts to create a hole for the faucet to sit after the concrete was poured. After this image was taken we added more fiber mesh around the sink.
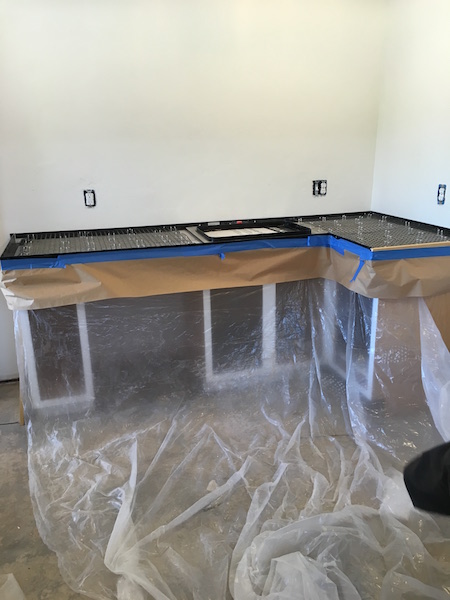
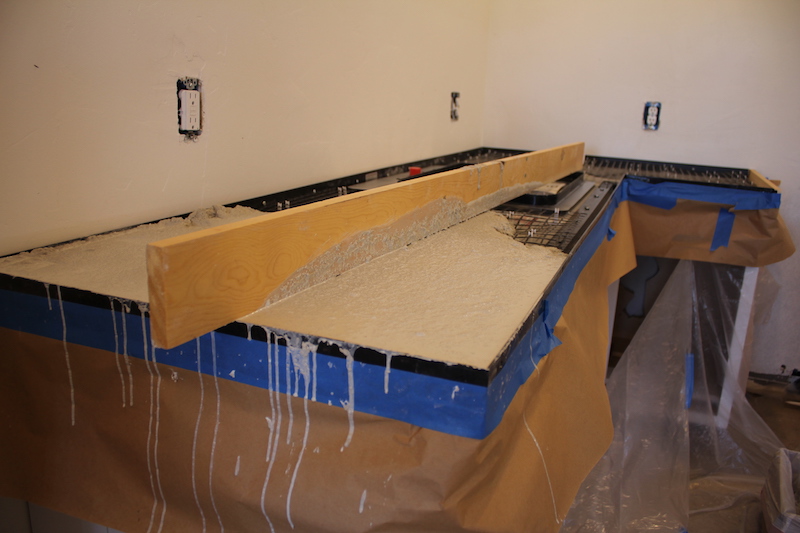
We added paper to the front of the cabinets with an extra layer of plastic behind. We didn’t know how messy it would get so we wanted to be prepared….it was WAY messier that we thought! HA! We even had some of the concrete leak behind the cabinets. :/
Lesson Learned
Now is when I talk about lessons learned. We added a little bit a caulk around the forms where it met the Durock, but I would say we did not add enough. Next time I would be sure to add a thick line everywhere, along all the forms and all corners where cement could leak out.
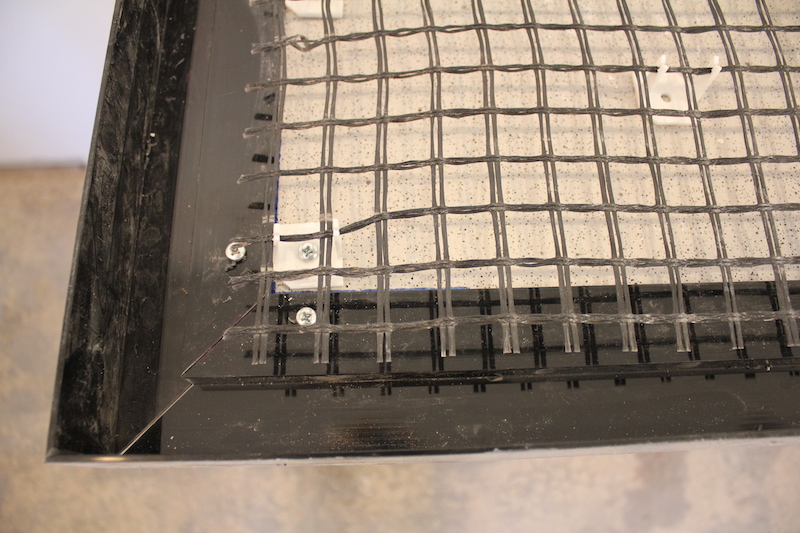
Lastly we added the fiberglass mesh and Z Clips. Since the mesh is made out of fiberglass, gloves are a necessity. The fiber mesh helps to make the concrete stronger and prevents it from cracking.
The Z clips are small white clips that are screwed down to the Durock every few inches. The mesh is then secured to the clips. This helps the mesh stay suspended at optimal height when the concrete is poured.
The mesh is rolled out onto the durarock and then the Z clips are screwed down every few inches.
POURING CONCRETE:
This is when it gets really fun! One thing to note, you don’t just pour concrete, make it level and its done. Concrete takes time to set up and the smoothing process takes time. Don’t attempt to start you pour at 6pm at night, otherwise you will be up late! The whole process of pouring, from start to finish took us about 6 hours. (that didn’t include prep work)
We opted to use the white concrete mix, as I mentioned before, that is designed for countertops. We followed the directions on the bag for mixing. We actually didn’t have a large enough drill to mix the concrete with so we opted to go cheap and picked one up at Harbor Freight. As we were mixing the concrete, the drill started to smoke…yikes! It did get the job done though, luckily.
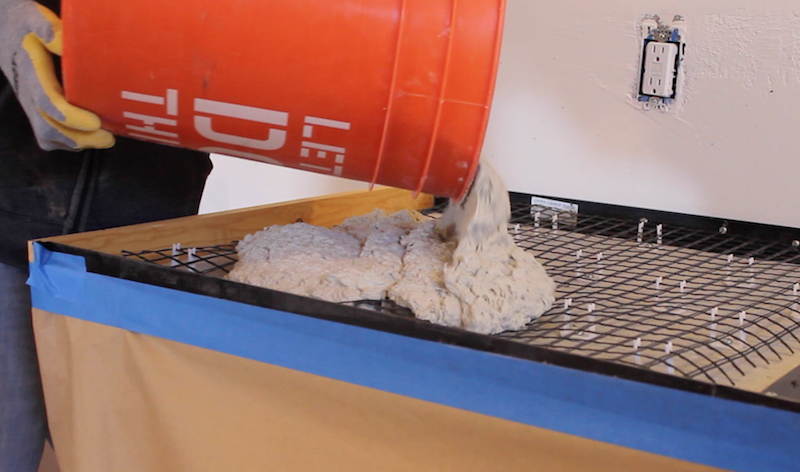
We mixed and poured bucket after bucket. Working on one section at a time, Mr. Main would mix the concrete and I used a scrap piece of wood to screed, or level the concrete. Then we used a magnesium float to draw out the water and then we followed up with a countertop trowel to make it really smooth. We watched all of the Z Counterform videos to learn all about how to trowel and smooth the concrete. We did a test pour before the actual pour itself. This was very helpful in getting a feel for how to manage and smooth it out. Did I mention to watch the videos…..watch them!
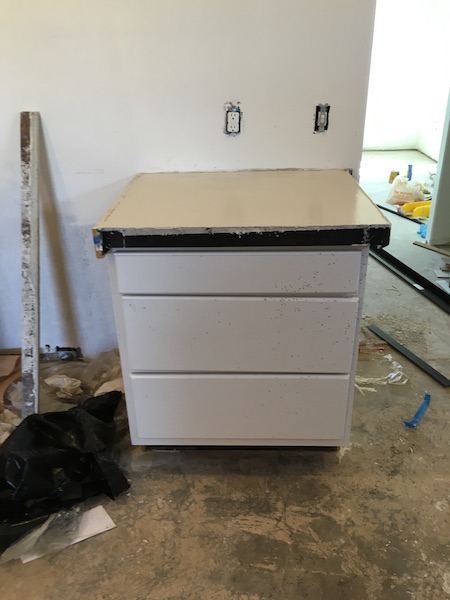
We let the concrete sit over the weekend before we removed the forms. Here is a quick video showing you how cool these forms are and how easy they are to remove.
Remember how I talked about the mess earlier….yep! It was definitely a dirty job.
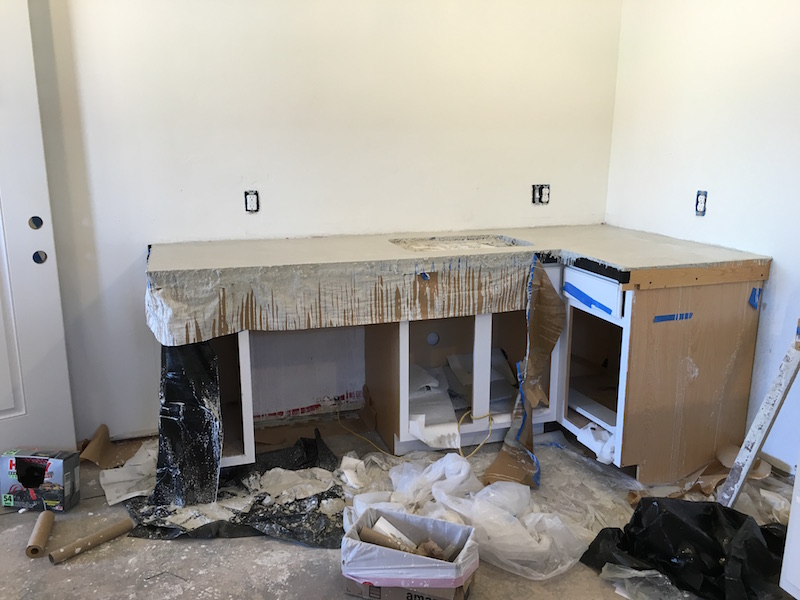
After the weekend we removed the forms and gave the entire surface a good sanding. We started with 15o grit and went up to 300.
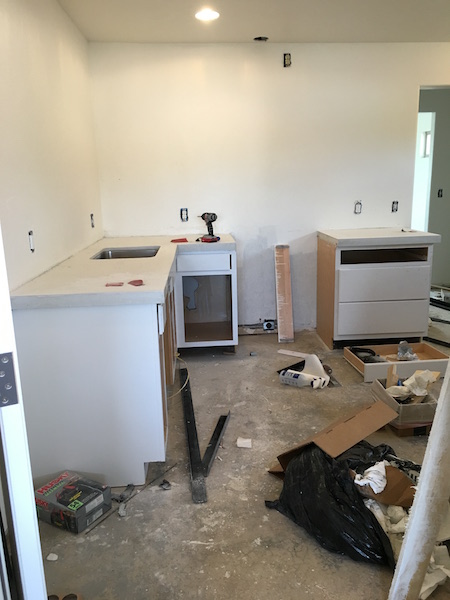
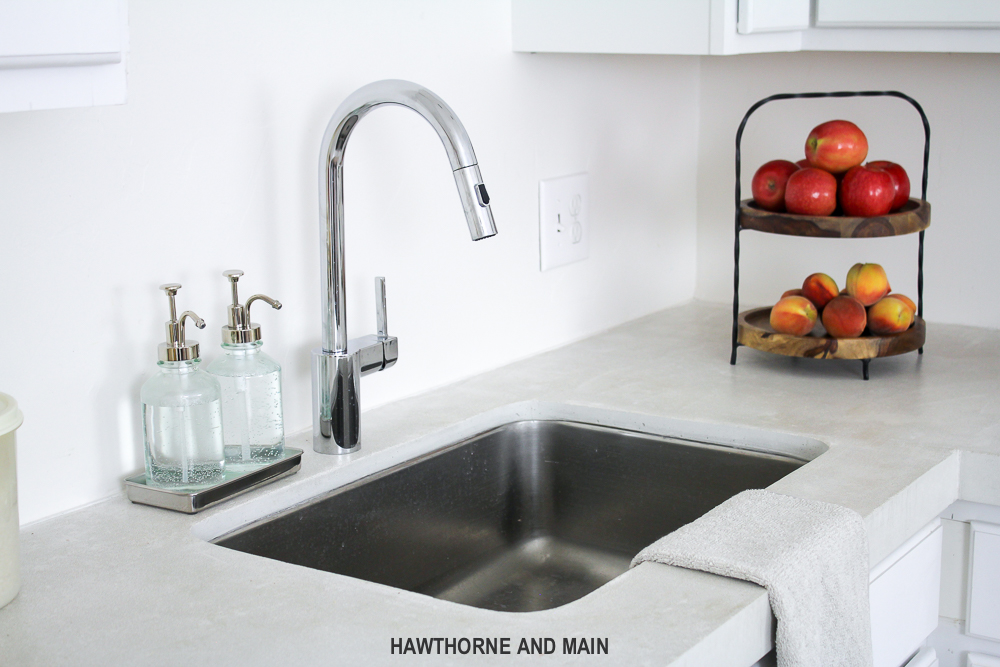
I love how they turned out, especially since this was literally our first pour (aside from the small test we did) I would say we got a little bit more dark specks in it than I would have liked to see but it gives it little bit more character. We ended up using the Z SiAcryl 14 to seal the countertops. It is a durable food safe product.
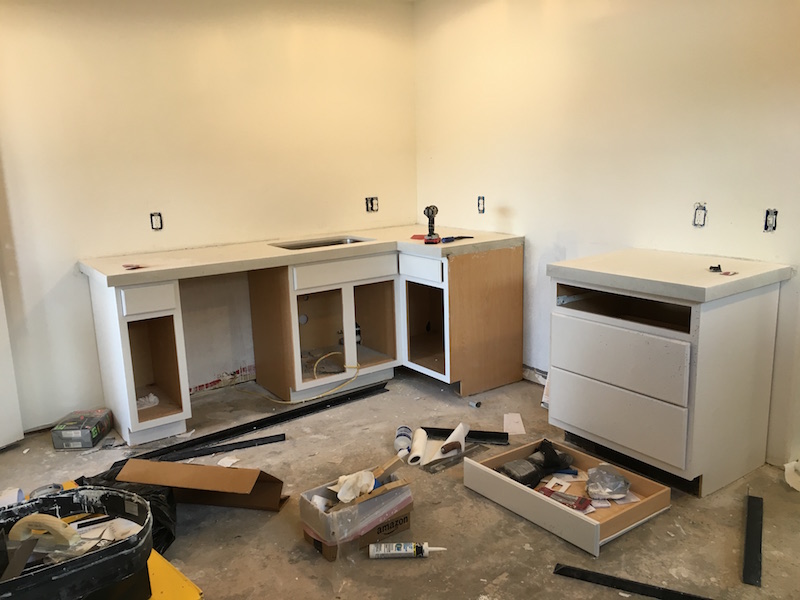
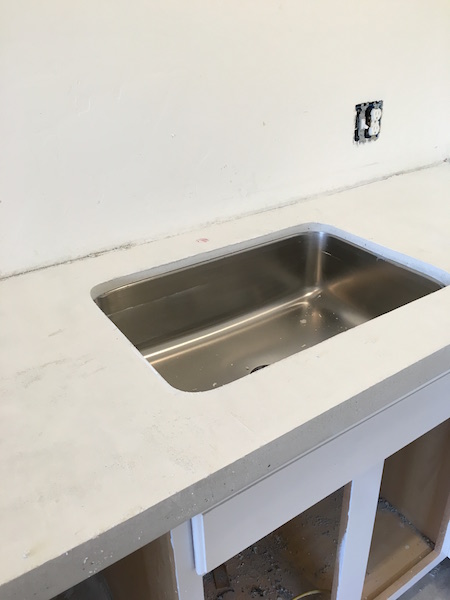
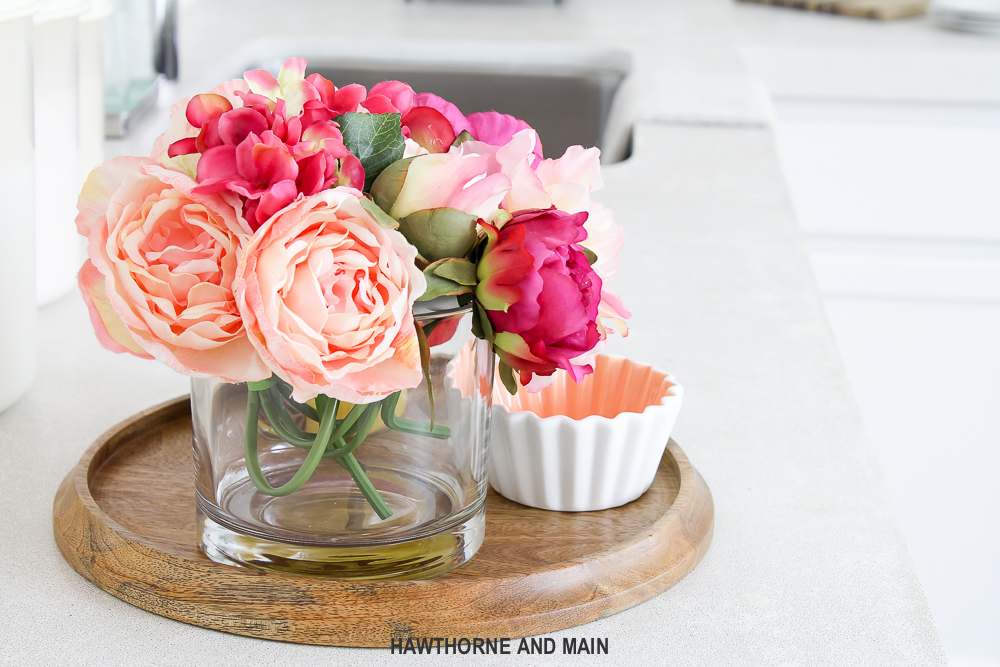
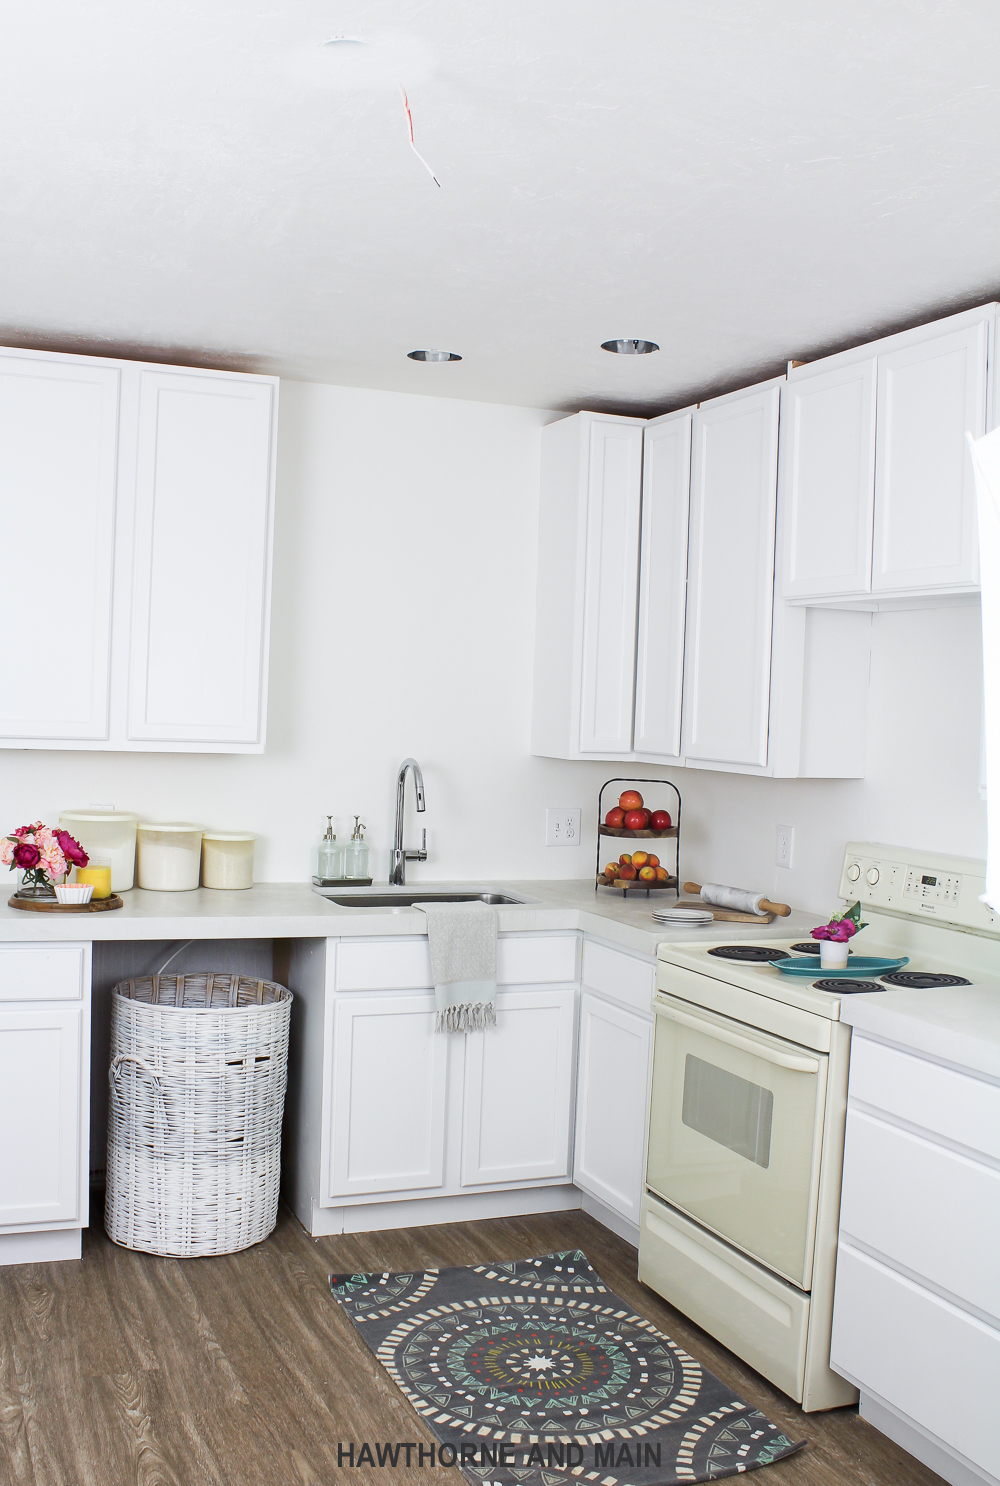
And now for the finished look! The Suite Pecan is looking so so much better than when we started. We still have a few things that need to get finished in the kitchen.
-Crown molding installed
-New appliances (including a dishwasher)
-Floating shelves installed above sink
-Can light covers installed
-Install pendant light above sink
-Install tile backsplash
-Install cabinet hardware
What do you think? Would you ever attempt the DIY counter tops?



These look incredible!! I would be so intimidated to pour my own concrete countertops, but the way you broke down the process, it doesn’t seem so complicated. Thanks for linking up with our Merry Monday party this week.
It’s really not complicated but rather takes time and patience. I didn’t realize that it takes so long to smooth and wait and smooth and wait for the concrete to get “finished.” I do love the final product though!
wow, thanks for the thorough tutorial. I want to do concrete counter tops. Thanks for linking up to the Talk of the Town party. I am pinning this!!.
You bet Becky! I really have enjoyed them. If you ever get the chance, I recommend them.
Your countertops are beautiful! You guys did an amazing job!
Thanks Lisa. I was so worried about doing them DIY but they turned out pretty cool.
Wow, your countertops look fabulous. Thank you for sharing with us at #HomeMattersParty . See you again next week
It’s looking SO good! You did an awesome job on the counters!
Wow! I love your concrete countertops! We were thinking about making our own wooden countertops but now that I see how the concrete looks, I have second thoughts…
The concrete is really fun! Definitely look into it.
Love the counters but i also must know… where can i get that fruit stand??!
Thanks Meredith! I got this stand from Pier 1. It seems to be out of stock right now but check back in the next few months as it might become available soon. http://www.pier1.com/napa-wood-%26-wrought-iron-2-tier-server/2950367.html?st=2950367&s_cid=aff0000002&utm_campaign=www.pier1.com&utm_medium=Affiliate&utm_source=7518026
You’re counters came out beautiful and I really like the way you styled them after.
Pinned and tweeted!
Thanks for joining us for the Wake Up Wednesday link party!
We hope to see you next week!
Kate | TheOrganizedDream.com
Thanks Kate, you are so sweet. Thanks for sharing, I really really appreciate it.
I keep going back and forth over concrete counter tops in my kitchen because building wood forms looks fiddly. I like your concrete forms and put concrete counter tops back on may Very Seriously Consider design list.
It is a tough decision, I totally get it. I really like our counter tops. I would recommend watching a bunch of videos about it and look at other peoples experience before you make a solid decision. So far we love these though!
These are probably the best concrete counter tops I’ve seen! Beautiful!
Thank you Heidi! I am so pleased with how they turned out.
Your concrete counter tops turned out quite nice! Looks like a lot of hard work involved in the process but I’m sure you’re enjoying your new kitchen now! Thanks for sharing how to do it! Blessings, Janet
Thanks Janet. To be honest, I was DREADING it…but once we started to actually get working on it, it wasn’t that bad. It was actually sort of fun. We hadn’t had that much experience with concrete so the whole process was fun for us.
Hey there!
I absolutely love this look! Do you have the cost broken down?
Thanks!
I’m researching doing concrete in our kitchen. I saw somewhere that they can get oil stains pretty easy, even when seated. What has been your experience? I love the look of your countertops!! 🙂 And appreciate the breaking it down clearly. Looks like a great company to work with! I’m trying to decide if I should consider a very dark concrete because I use oils a lot LOl.
Oops, sealed. Not seated.
My spellcheck is miscommunicating for me :/
sunshine-plumbers is your go-to solution for all your plumbing needs. With a commitment to quality and customer satisfaction, we offer a wide range of services, from routine maintenance and repairs to complex installations. Our team of licensed and experienced plumbers is available 24/7, ensuring that you receive prompt and reliable service whenever you need it.
At https://www.sunshine-plumbers.com/, we understand that plumbing issues can be stressful. That’s why we prioritize quick response times, transparent pricing, and professional workmanship. Whether it’s a leaky faucet, a clogged drain, or a complete bathroom remodel, we’ve got you covered. We use the latest technology and highest quality materials to ensure long-lasting results.
Choose sunshine-plumbers for dependable, efficient, and affordable plumbing solutions. Let us bring a little sunshine to your day by solving your plumbing problems with ease. Contact us today to schedule your service!