
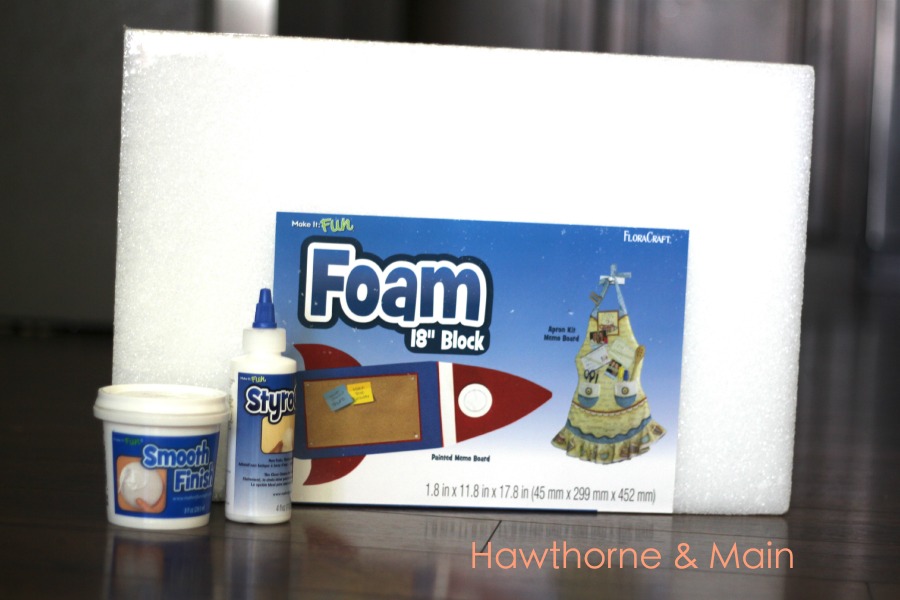
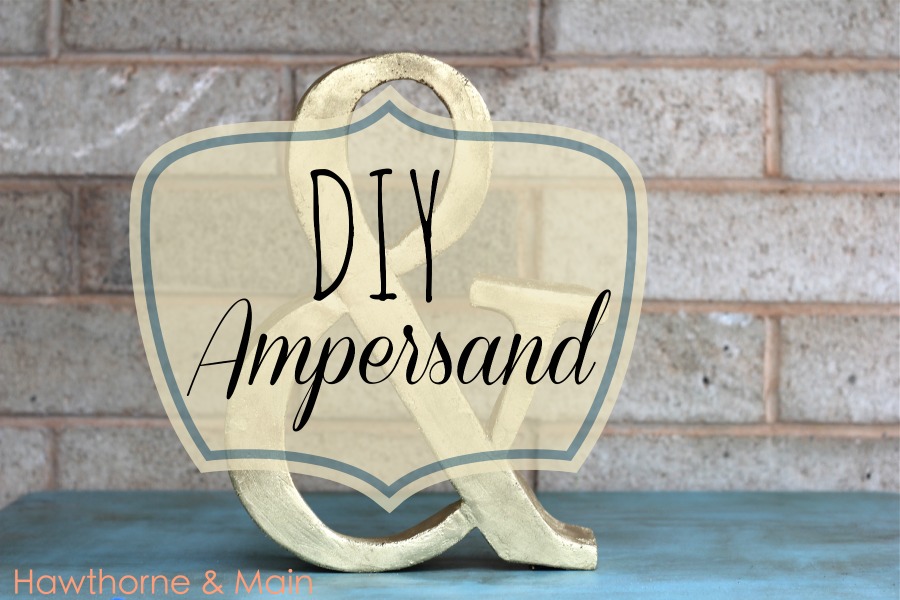
I’m pretty excited to share with you how I made this ampersand! This was one of those projects that came to my mind and I thought “wow I am genius”.(just kidding) But really, I saw the whole project flash in my mind from start to finish and it came together so flawlessly. Not the case. Don’t get me wrong I love how it turned out and I actually went and bought another Styrofoam board after I was done making this one so I could do another one. So it wasn’t that bad. Hopefully I can share some tips to make this project go easier for you.
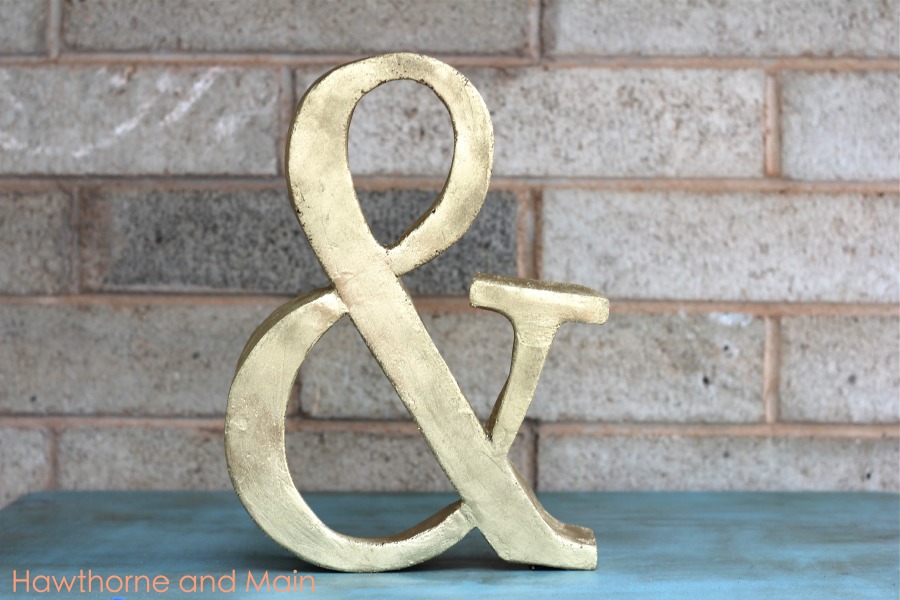
First of all, can you believe that this ampersand is actually made of styrofoam!!
the Hawthorne and Main blog uses affiliate links, to learn more check out our policies page
& Sign 2
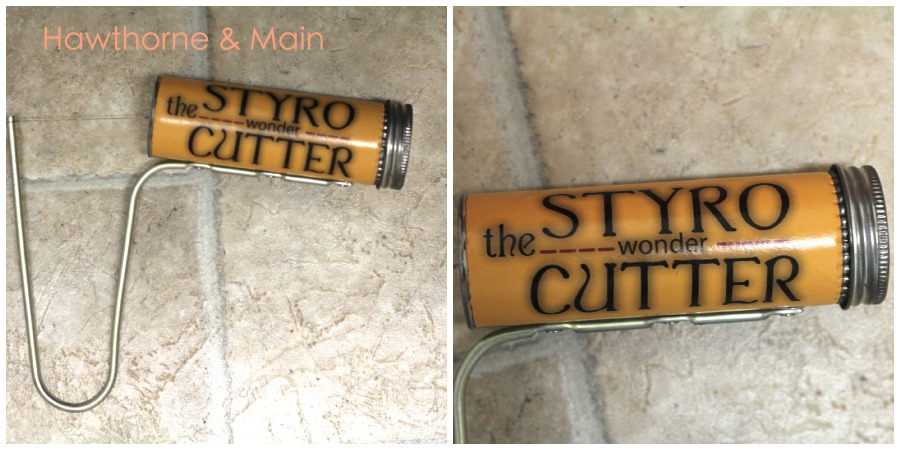
It’s pretty easy to use, but please read all of the directions before you begin. Also it might be a good idea to use a corner of the styrofoam to practice and get a feel for how fast it cuts through the styrofoam.
Caution! The cutter cuts by melting the styrofoam so be careful not to burn yourself.
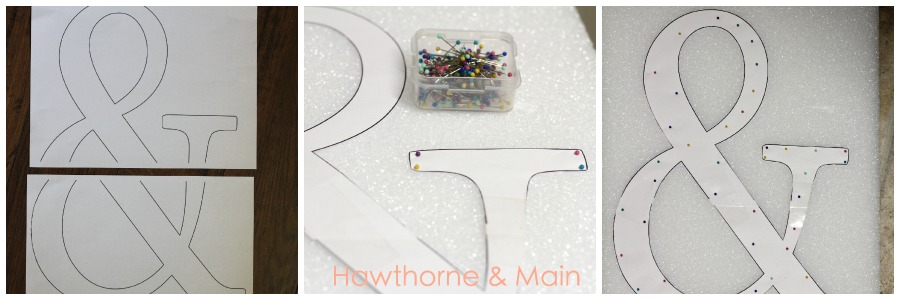
Cut out the entire perimeter of the ampersand. Then make three additional cuts as you can see in the picture below, where the three red lines are. You might have to tear the paper in order to cut the holes of the Ampersand out.
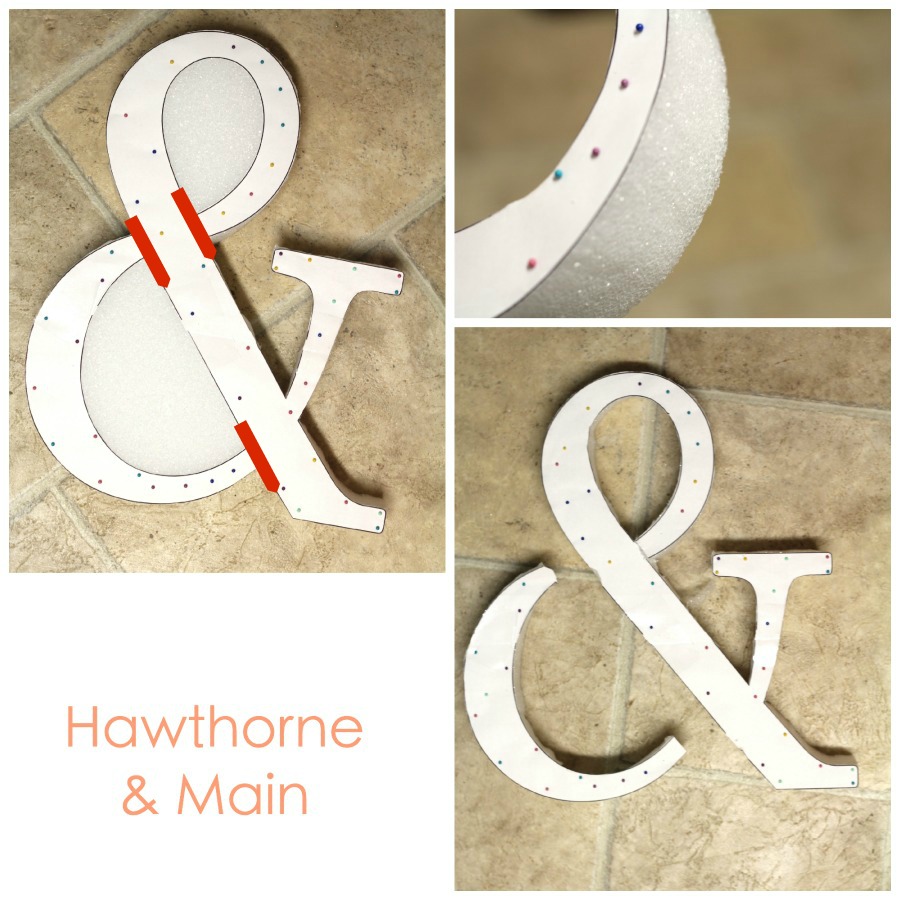
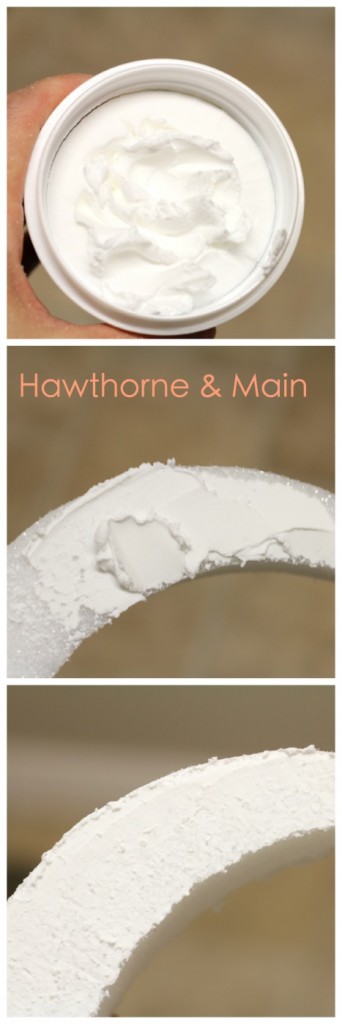
When fully dry use sandpaper to lightly smooth the entire surface. Then use the styrofoam glue to stick the two pieces back together. You may need to add a small patch of Smooth Finish to cover up the glue seams.
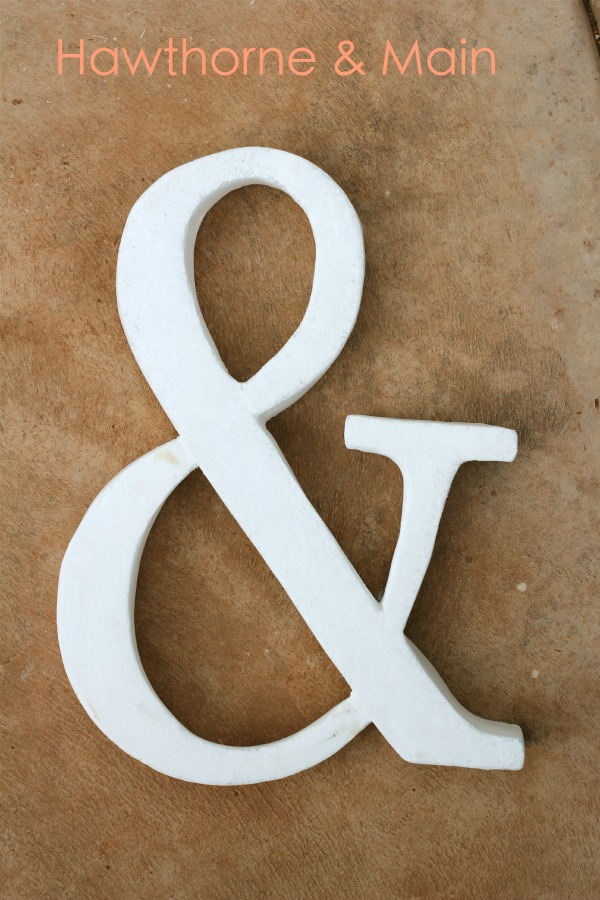
Here is what mine looked like after sanding it.
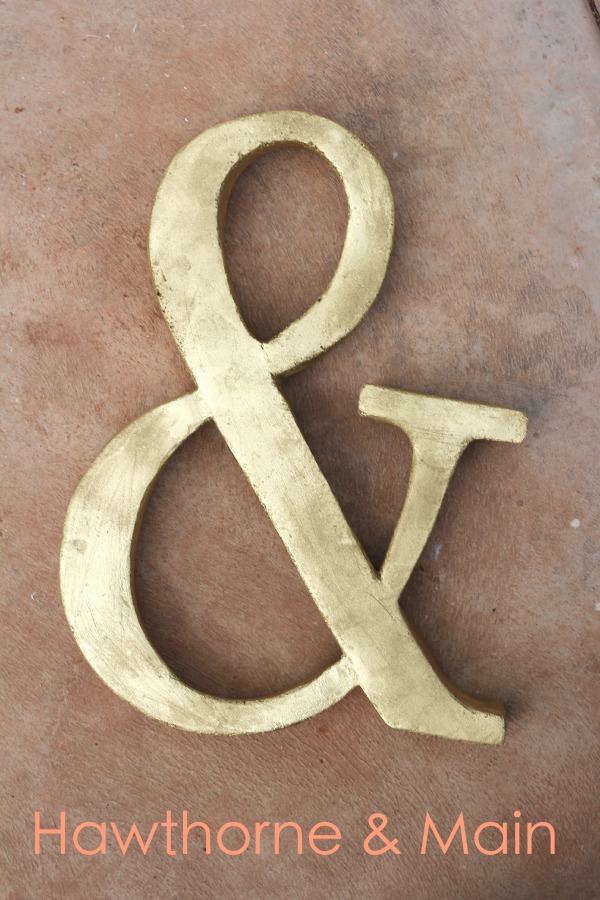
Here is what it looked like after spraying it with gold spray paint. .
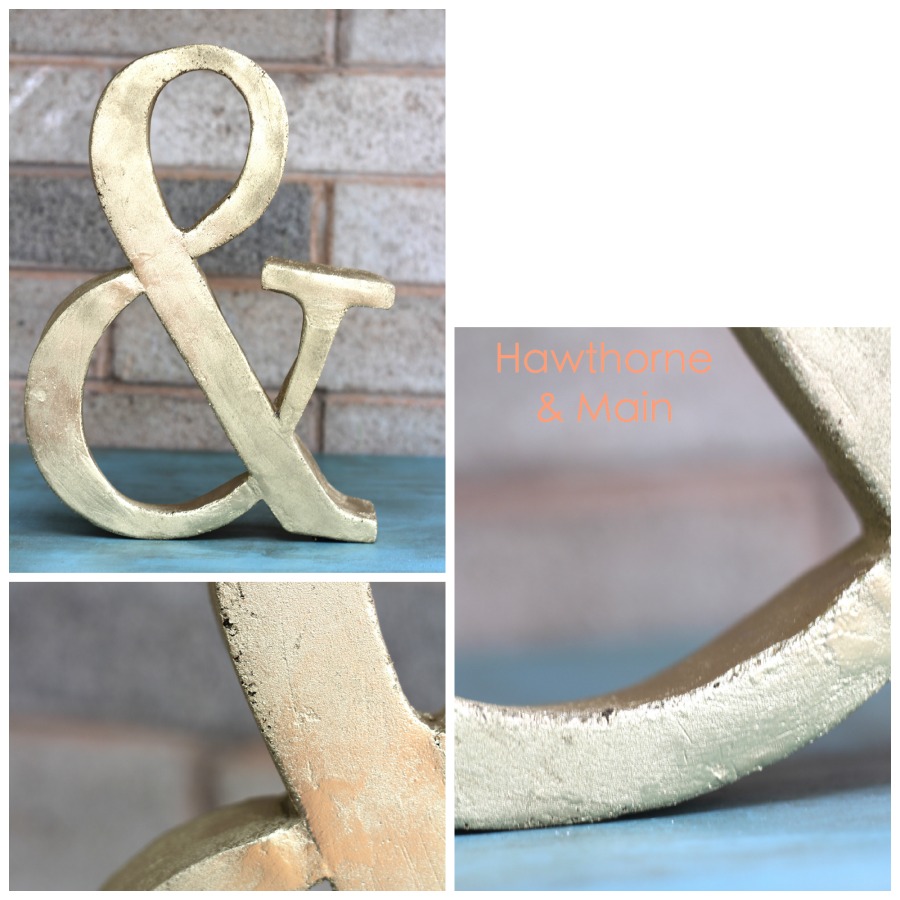
Finished!!
When I showed my husband the finished product he asked, “is that a piece of metal?” The not-so-even areas of the Smooth Finish also added character, and apparently made it look like metal. Not exactly what I was going for, but I LOVE how it turned out.
This will be an accent piece for my command center. What do you think? Have you ever cut styrofoam before?
Thanks for stopping by today!!


Love, love, love this Shonee! It looks like the concrete ones that I've seen in terms of texture around the edges and looks like metal with the finish…..A perfect combination!
I have never seem a styrofoam cutter before. A couple of Christmas's ago, I made large gingerbread cookies cut out of styrofoam and coated with joint compound, but it was such a paint to cut the styrofoam…..I totally need to get me one of those tools!
Thanks for sharing this great project!
Jamie if you have cut styrofoam before and you didn't use this cutter, it will change your life when you do get to use it. It is sooo easy! Too bad you didn't know about it before. Let me know if you get one and make an awesome project. I want to see it.
This turned out gorgeous – I bought one ( a white one ) and it was expensive – AND I like yours better – beautiful job!
Hopping over from An Extraordinary Day where this caught my eye first thing
Hugs,
Suzan
Suzan thanks! That is one of the reasons I decided to make one myself, it was really inexpensive. I am so happy you like it! Thanks for stopping by!
This is so cool!! I didn't even know that smooth finish stuff existed…so many possibilities… Thanks for sharing!
Thanks Kat! I am new to smooth finish as well. I love it! I have thought of some other stuff to use it with too.
Great project! I learned about multiple products I never knew existed. Thanks for sharing!
Kelly thanks for stopping by. Definitely check out the cutter and the smooth finish, they are both great.
Really neat project. Maybe I could use the same procedure to do letters for my daughter's name.
Mary thanks! That is a great idea, there are so many possibilities! Please share if you decide to give it a try 🙂
PS. I pinned you here: http://www.pinterest.com/marykatbpc/deorating-dyi/
Thanks a bunch!!
This is amazing! I love how you got the Styrofoam to look metallic! Pinning (for my upcoming wedding!)
Oh congrats on getting married! I totally was not expecting it to look metallic, but I really like how it turned out.
How cool! I didn't know you could do something like this, thanks for sharing!! I'd love for you to share at our link party going on now.
http://www.delineateyourdwelling.com/2014/08/link-it-or-lump-it-party-number-49-and.html
Amy thanks for the invite to your link party!! I just linked up. This project was totally new to me too. I have cut styrofoam before but never used the smooth finish. It is pretty cool stuff
I love this idea, how cool and the gold is perfect. Thanks tons for linking to Inspire Me.
Hey Marty! Thanks for hopping over to say hi. Love linking up to Inspire Me.
Such a great idea!!! Love the gold!
Thanks Beth! I really like how it turned out. If you asked me a year ago if I liked gold I would have said no. Now I cant get enough of it.
I love the texture you gave this Shonee. It looks great. Thanks for partying with us at The Makers!
Corey @ TinySidekick.com
Thanks for stopping by Corey. I always love linking up at The Makers!
Wow that looks amazing – you would never know what's it's really made of.
Totally cool huh! I was really surprised it turned out so good. Thanks for stopping by!
Love this! I'm really digging gold lately. Thanks for sharing.
Kristi
If you would have asked me a few years ago if I liked gold I would have laughed out load and said it was for the older generations. I hate to say that now because I am totally with you. I am really digging it. Thanks for stopping by Kristi!
Love how this turned out… great fall projects! I'm featuring your ampersand tomorrow in my Friday Features. Thanks for linking up to Inspire Me Monday!
Wow Maryann thanks, you made my night! Always enjoy getting inspiration from Inspire me Monday!
This turned out so cute! Thanks for sharing at the Bloggers Brag Pinterest Party.
Thanks for stopping by Kim!
Loved how this turned out. I featured it at our link party today! Be sure to stop by and grab a feature button, too!
http://www.delineateyourdwelling.com/2014/08/link-it-or-lump-it-party-50.html
Amy thanks! You totally made my night!! Loved all of the other features that you chose too.
This looks great! I'd love to spray it with a silver color and give it a zinc look… I might have to get my butt up to walmart!
Colleen what a great idea, that would look so cool. There really are some many options. I almost tried using that textured spay paint that makes it look like rock, maybe next time.
I love this so much! Thanks for linking it to Motivational Monday – I'll be sharing it as my favourite project from the party tomorrow on TheDIYMommy.com! 🙂
Wow thanks Christina! That just made my day! Your plug for my little foam ampersand was super nice, thanks!
This looks so cool! Pinned. We truly love having you be part of our party. I hope you get a chance to stop by tonight. It wouldn't be a party without you! http://loulougirls.blogspot.com/
Happy Monday! Lou Lou Girls
Thanks Kim! I feel bad, I think I missed your party this week 🙁 We had family here and I got out of my routine. Next week I should be there!
Love this, thanks for linking it up to The Creative Collection.
Thanks Rebecca. I really like linking up over at The Creative Collection!
Love what you did with the ampersand 🙂
We appreciate you linking up at Teach Me Tuesday last week! Thank you so much!! Hope to see you again this week!!
http://3glol.net/2014/08/11/teach-tuesday-16/
Have a great day!
Thanks Bobbie! Glad you like my ampersand 🙂 I will be there again next week!
This turned out great! I can't believe it's made out of foam. It looks lovely. =)
Honestly Jessica I can't believe it turned out so great either…did I just say that!! Sometimes my projects actually turn out ok 😉 Thanks for stopping by to say hi!
Such a neat project! I'm featuring it at this week's link party! http://www.thelifeofjenniferdawn.com/2014/08/a-little-bird-told-me-link-party-103.html
Wow Jennifer, thanks! Great party, and loved all of the other features you chose!
Hi Shonee,
Just wanted to lyk that you are one of my features for the Merry Monday #16 link party. I appreciate you linking up with us each week and I hope to see you at the party again.
Thanks for featuring my DIY Ampersand 🙂 Love linking up and guest hosting!
Get Out! I can't believe your awesome & is made from Styrofoam! Wonderful job on the tutorial.
Pinning! Thanks for sharing on Show-Licious!
~ Ashley
haha! Thanks Ashley. I think I might need to explore Styrofoam more since this project turned out so great!
This is seriously cool! I had no idea you could buy styrofoam like that, or that you could cut it. Great project! A couple friends and I are starting a link party this weekend and I'd love for you to link this up! It's at http://www.averystreetdesign.com on Saturday at 8 PM. We're calling it "Found & Foraged." Hope to see you there! xo, Laura
Thanks! Styrofoam cutting is pretty cool! Love your party!!
I haven't been able to access the "how to." It comes back to this page when I click on "continue reading."
What a money saver!!! And it looks gorgeous! Can’t wait to try this!
This one if one of my all time favorites! Hope you will give it a try.
https://wiethuis.com/