Have you ever opened a magazine and felt like a light shined down on you. You say to yourself “YES, yes I can!”
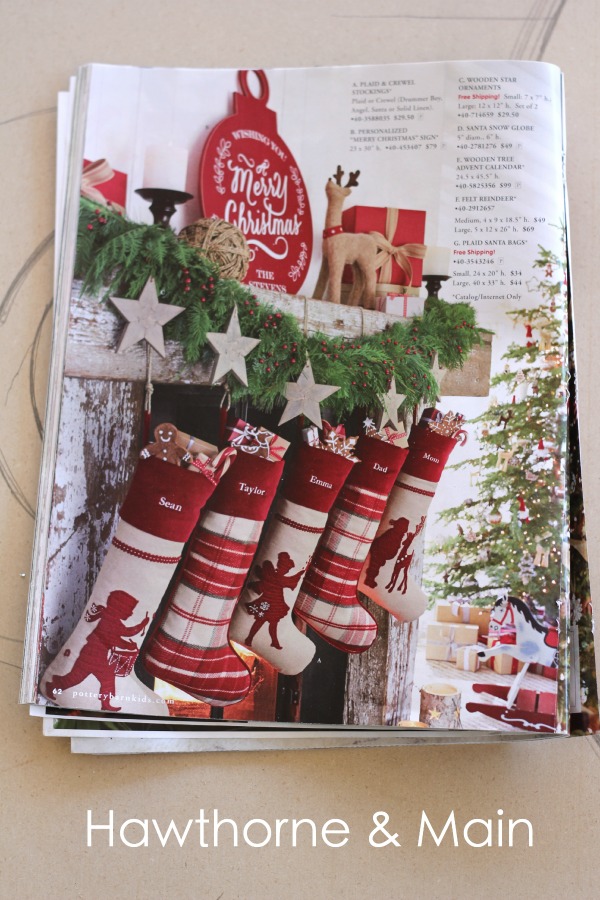
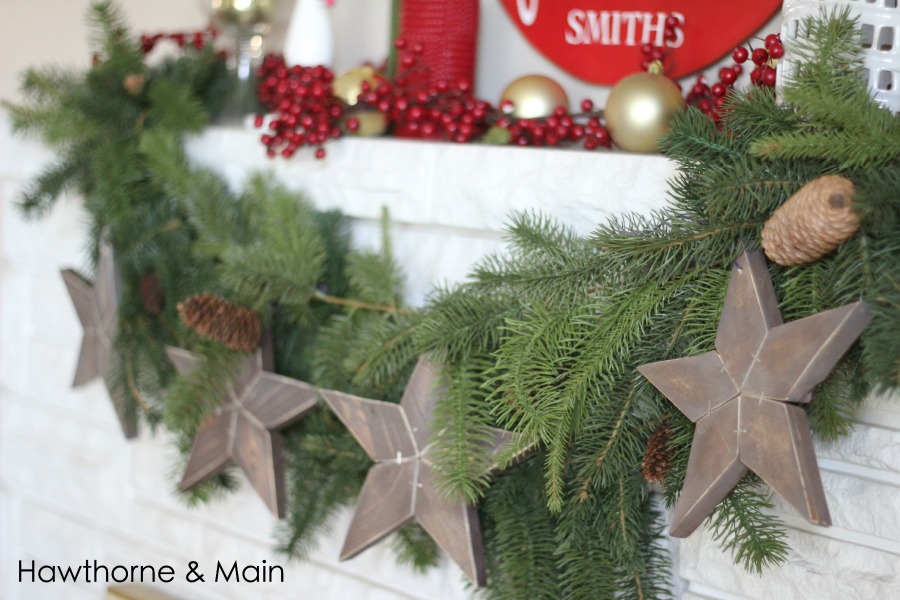
That was the exact feeling I got when I open my Christmas Pottery Barn magazine and saw this mantle.
Ideas were swirling though my head and I just knew that I was going to pull it off…..almost….I won’t go into too much detail about my craft fails….lets focus on the positive, shall we!?
To see the giant ornament go here, and to see my traditional mantel go here. Also check out my plaid christmas home tour.
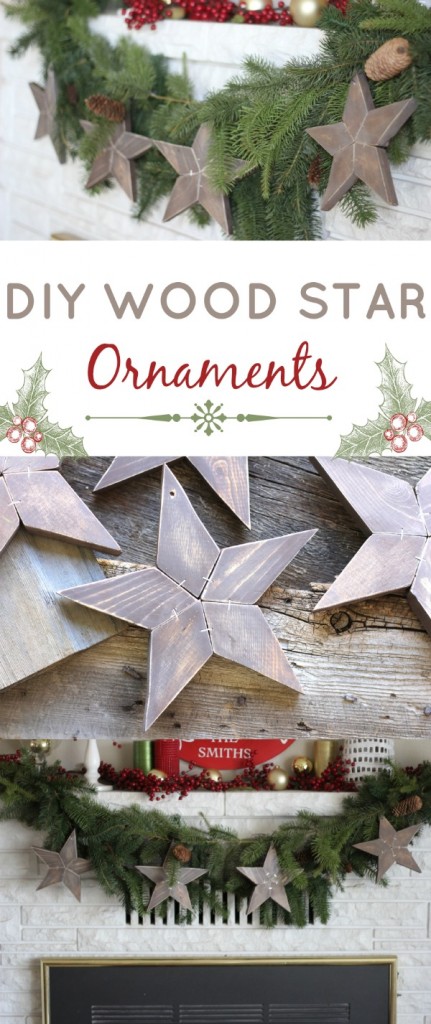
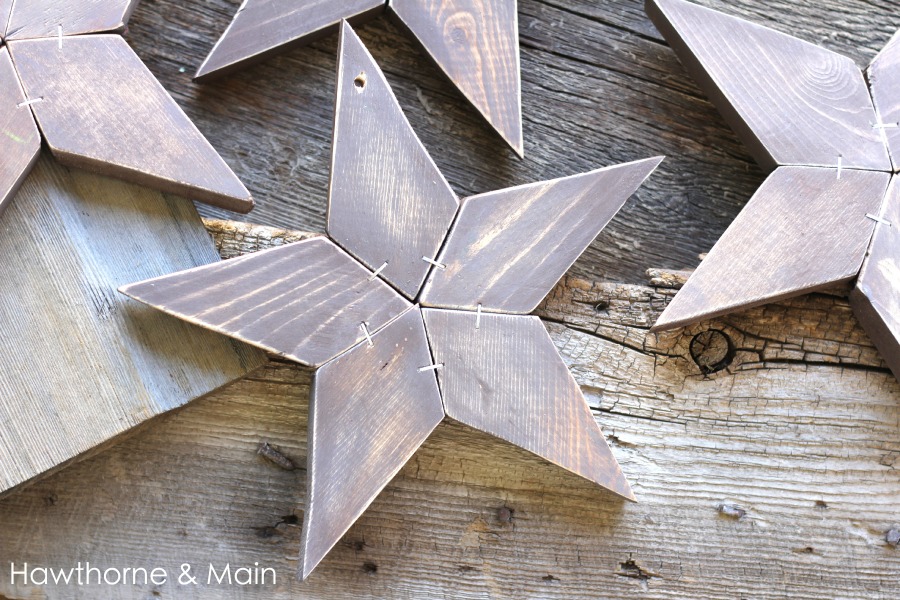
Today I am going to show you how I made these wonderful DIY Wood Stars! These are for real easy!
-1 inch board- I used some scrap wood that I already had
-Scroll Saw
-Rust-Oleum Carrington wood stain
-Staple Gun
-Wood Glue
-Drill
TUTORIAL:
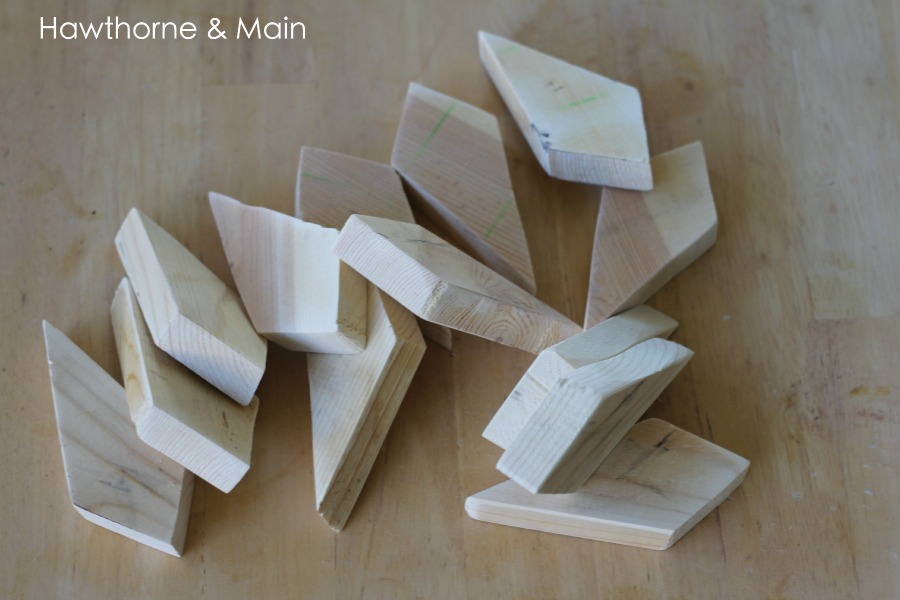
To start print out the star image. Cut out each star point to match the pieces below.
Use one of the pieces of paper as a stencil and trace out a bunch of them. Use the scroll saw to cut them all out.
Be patient with the saw, especially if you are new to it. It’s not hard but does take a little bit of practice.
After they are all cut out use some sand paper to remove the really rough spots.
Using gloves apply the wood stain.
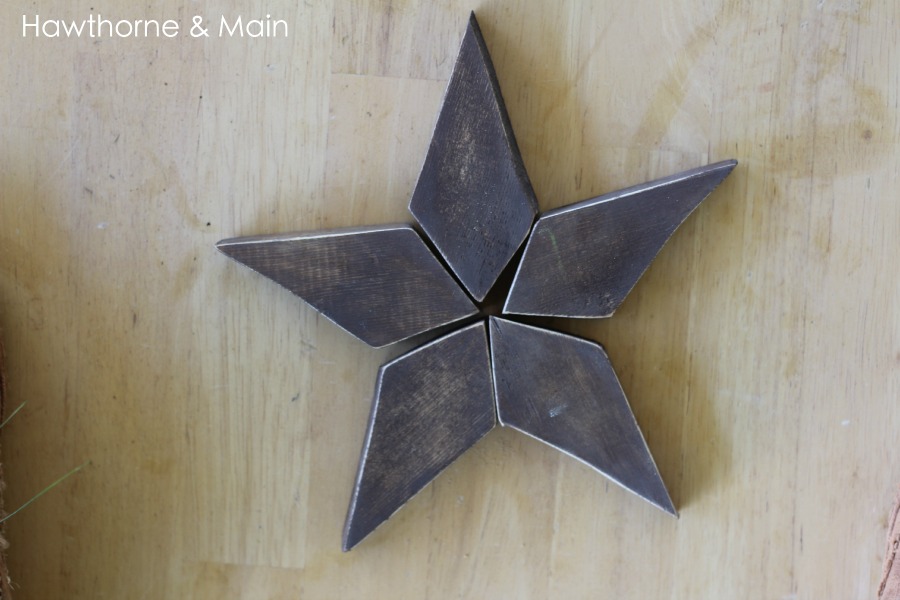
After the stain has dried take and sand the edges slightly to give them a rustic look.
Now the fun part!
Take the wood glue and glue each star together. Before the glue hardens add staples to both sides of the stars. This helps hold them together.
Drill a small hole at the top of one of the points on each star for hanging.
Finished!
If you decide to make these stars let me know!! I would love to see them. I think these stars would look good year round, not just for the Holidays!
Thank for stopping by today!
To see more projects check out my gallery wall here, or click the image below!



Pinned & shared! Love these stars! 🙂
Thank you for sharing with us at Retro RePin Party! This is one of my favorites and it's featured during this week's party! Hope you stop back and link up again 🙂
~ Happy New Year!
Robin
Hello
Thanks Tara! They are pretty fun. I actually just got some of my Christmas stuff out today to take an inventory and try to remember what I have. I found these stars and will probably use them again!
I LOVE these! Any idea on how to pull this off if we don’t own a scroll saw?
Good question Kymee. You could try to use a jig saw… but be very careful to watch your fingers. One thing you could do is to use a clamp to clamp the wood to the work bench. This way you would not have to hold the wood in place as you cut and it would be safer. You could also use a chop saw or miter saw….I actually still need to get one of those myself, heres to wishful thinking!! Good luck!
I just made 12 of these and used a jigsaw. Clamped to a table so the wood would not move. That way I could use both hands to maneuver the saw. I used a belt sander to sand the edges down some on the front of each piece. Turned out amazing! I’ve yet to stain them and assemble. But am excited for them!
Yay! Good idea clamping the wood down, that is definitely the smartest way to do it. If you get them finished tag me in a pic, I would love to see them! Have a great weekend!
Love, love, love these!
Hahaha, thanks Sharilee! I really love how they turned out too!
This is such a pretty ornament. Goodness I can’t believe Christmas is right around the corner. These would look really nice in sets and you could hang them in pairs. Thanks for the tutorial.
That is a really good idea Mary. They really are so easy to make and with some extra creativity you could really make them look awesome!
These stars are so fun Shonee! I pinned this to my Christmas board. Have a great week and take care, Tara
Thanks Tara! They are pretty fun. I actually just got some of my Christmas stuff out today to take an inventory and try to remember what I have. I found these stars and will probably use them again!
So cute! Great way to use up some scrap pieces of wood too! Pinning!
Thanks Pamela! That is so true. I literally didn’t need to purchase anything for these stars. I just used scrap wood and stain that I already had on hand! Thanks so much for pinning!! xox
I love the stars! I agree, they would be awesome year round. I think I need to make some!
Thank you Kati! I totally should have left these out after Christmas last year, but they got packed up with the rest of the stuff. When I found them again this year I had the same thought that they need to be out more than just at Christmas. If you give these a try, let me know. I would love to see a pic!
Love these wooden stars…….I hope mine turn out as good as yours…Thanks so much for sharing on Inspire Me Monday link party. I hope to see you again this Monday….Have a great day! http://www.farmhouse40.com/inspire-me-monday-57
Thank you! These really did come together pretty quick. And, with the added wood glue and staples it is a pretty forgiving project. If you really make some, I would love to see them!! Good luck.
I love the stars. I hope to get some made before Christmas! Pinning.
Thanks Virginia! So glad you are going to make these!! I seriously love mine! Thanks for pinning!
These are so cute. I am going to have to attempt making some.
Thanks Charlene! These honestly are not bad to make. Take it slow on the saw and before you know it you will have a bunch of fun new stars!
This is such an amazing idea! Thanks for sharing it. I’m Anita visiting from Think and Make Thursday Link Party.
Thanks Anita! It’s nice to meet you! I love these stars and have already used them this year again!
Awesome job! You really nailed the look! Thanks for sharing with us at Merry Monday, I’ve pinned and tweeted!
Thanks Megan! I already have go these wood stars out for this year! Thanks for the tweet and pin! xox
I’m pinning these! What a great little project! They are just darling!
Thanks Robin! I am really happy with the way that they turned out. Super excited to use them again this year!
These stars are AWESOME! Kudos to you!!! Thanks for sharing with us 🙂
XOXO
thanks! I love them too! I am super excited to use them again this year!
I am a star nut and I LOVE this! Thanks for providing the star pattern, look forward to getting started!
yay! So glad you like it Audra. I love stars too. I hope that you will give these a try.
So so so beautiful! I am pinning this one too! Thanks Shonee!
Shonee these are great! I am not sure I am that brave to cut all those small pieces myself…I”ll have to ask the hubby if he’s up for this one ; )
Well the first few were a little scary but I sort of got the hang of it. This sounds like to perfect project for hubby!!
Hi, Shonee! I know this is an old post, but would you mind sharing which stapler you used? Is it manual or pneumatic? I love these stars, and made a few, but ditched the project because my stapler uses much larger staples, and they didn’t look good. Thankfully I only stapled one so far. Thanks for the great tutorial!
Oh no! I am so sad you had to ditch the project…. I used a cheap stapler, I linked to it below. Maybe try gluing them together first and let them get hard, then add the staples. And, if you don’t anticipate these being handled too much you might be able to get away with only adding glue. Hope this helps and I hope you are able to get them done.
https://www.amazon.com/Stanley-Tr110-Heavy-Steel-Stapler/dp/B000ONZ1D4/ref=sr_1_1?ie=UTF8&qid=1478682483&sr=8-1&keywords=wood+stapler
Howdy! Quick question that’s entirely off topic.
Do you know hhow to make our site mobile friendly?
My weblog looks weird when browsing from my
iphone4. I’m trying to find a themee or plugin that might
be able to correct tbis issue. If you have any suggestions, please share.
Thanks!
I thik the admin of this website is in fact working hard in support of his website, for the
reason that here every stuff is quality based data.
Write considerably more; that’s all I include to say.
It appears as though you depended on the video iin order to make our
point. An individual know what you’re discussing,
whyy waste ylur brains oon jst posting videro
clips to your blog whenever you could possibly be giving people something enlightening to go through?
Ideas were swirling though my head and I just knew that I was going to pull it off…..almost….I won’t go into too much detail about my craft fails….lets focus on the positive, shall we!?
You could try to use a jig saw… but be very careful to watch your fingers. One thing you could do is to use a clamp to clamp the wood to the work bench. This way you would not have to hold the wood in place as you cut and it would be safer. You could also use a chop saw or miter saw….I actually still need to get one of those myself, heres to wishful thinking!! Good luck!
Hello
I know this is an old post, but would you mind sharing which stapler you used? Is it manual or pneumatic? I love these stars, and made a few, but ditched the project because my stapler uses much larger staples, and they didn’t look good. Thankfully I only stapled one so far. Thanks for the great tutorial!
Hello
Good idea clamping the wood down, that is definitely the smartest way to do it. If you get them finished tag me in a pic, I would love to see them! Have a great weekend!
Hello
I just made 12 of these and used a jigsaw. Clamped to a table so the wood would not move. That way I could use both hands to maneuver the saw. I used a belt sander to sand the edges down some on the front of each piece. Turned out amazing! I’ve yet to stain them and assemble.
Hello
Thanks Pamela! That is so true. I literally didn’t need to purchase anything for these stars. I just used scrap wood and stain that I already had on hand! Thanks so much for pinning!! xox
Hello
from last week: Flour on My Face – Crock Pot Loaded Potato Soup Hawthorne and Main – DIY Wooden Stars Suzy’s Artsy Crafty Sit Com — Holiday Wrapped Ornaments Trial and Error Home Ec
You could try to use a jig saw… but be very careful to watch your fingers. One thing you could do is to use a clamp to clamp the wood to the work bench. This way you would not have to hold the wood in place as you cut and it would be safer. You could also use a chop saw or miter sawkite developer
I love these stars, and made a few, but ditched the project because my stapler uses much larger staples, and they didn’t look good. Thankfully I only stapled one so far. Thanks for the great tutorial!qr code
Thanks Tara! They are pretty fun. I actually just got some of my Christmas stuff out today to take an inventory and try to remember what I have. I found these stars and will probably use them again!
It appears as though you depended on the video in order to make our
point. An individual know what you’re discussing,
why waste brains on js posting
clips to your blog whenever you could possibly be giving people something enlightening to go through?kite
I think I need to hire someone like you to come deck out my house. I’m hopeless at this sort of thing. I know what I like, it just doesn’t get done! Tragic, I know. At least I can dream about someday become more adept at these things . Aluminium Security Doors Melbourne
I am sure your hummers will love it! Give them a little time to get used to the perches. Ours never went on the perch for a month or two, but then they couldn’t have enough of it. Now they are all over those perches ? SSD Cheap Web Hosting
Nice post. I find out some thing more challenging on different blogs everyday. Most commonly it is stimulating to read content using their company writers and exercise a little something from their site. I’d choose to apply certain together with the content on my own weblog regardless of whether you do not mind. Welcome to Jason’s Holidays
You could try to use a jig saw… but be very careful to watch your fingers. One thing you could do is to use a clamp to clamp the wood to the work bench. This way you would not have to hold the wood in place as you cut and it would be safer. You could also use a chop saw or miter saw….I actually still need to get one of those myself, heres to wishful thinking!! Good luck! cape verde holiday
That is so neat!! I think my Indiana Bluebirds would really feel royal eating from that !!
Mary, I look so forward to receiving your updated photos, everyone of them are just wonderful, and it lets me daydream for a few minutes! แบบการ์ดแต่งงาน
You could try to use a jig saw… but be very careful to watch your fingers. One thing you could do is to use a clamp to clamp the wood to the work bench. This way you would not have to hold the wood in place as you cut and it would be safer. You could also use a chop saw or miter saw….I actually still need to get one of those myself, heres to wishful thinkingYou could try to use a jig saw… but be very careful to watch your fingers. One thing you could do is to use a clamp to clamp the wood to the work bench. This way you would not have to hold the wood in place as you cut and it would be safer. You could also use a chop saw or miter saw….I actually still need to get one of those myself, heres to wishful thinking
from last week: Flour on My Face – Crock Pot Loaded Potato Soup Hawthorne and Main – DIY Wooden Stars Suzy’s Artsy Crafty Sit Com — Holiday Wrapped Ornaments Trial and Error Home EcCrocs
I am so thankful to you on writing such a detailed guide about pretty printable free templates. Feel free to check my work: satta matka
Hacopy brings forth the splendor of luxury with a gentle touch on your finances. Discover the perfect blend of opulence and practicality, where fine living meets wise spending.